## --------------------------------------------- ##
#      How to pull data from EDI or KNB
## --------------------------------------------- ##
# Script author(s): Angel Chen

# Purpose:
## This script shows you how to either read in data directly from EDI/KNB,
## or download the data first and then read in

## --------------------------------------------- ##
#               Housekeeping -----
## --------------------------------------------- ##

# Load necessary packages
library(readr)
library(EDIutils)
library(curl)

## --------------------------------------------- ##
#               EDI example -----
## --------------------------------------------- ##

# Getting a single file ------------------------------------------

# As an example, let's get ER_contour.csv from this EDI package:
# https://doi.org/10.6073/pasta/9b0cce476cb9a7f96575ff1c3d3155c3

# First specify the direct URL to the data file you want
# You can copy any data file's URL by clicking on "View Full Metadata"
# Scroll down to the "Detailed Metadata" -> "Data Entities" section
# Copy the URL associated with the data file you want

# Paste the direct URL to ER_contour.csv
edi_url <- "https://pasta.lternet.edu/package/data/eml/edi/1790/1/e64ec185b099968d9ae653d620e23d31"

# Reading directly
df <- readr::read_csv(edi_url)

# Or you can download first, and then read in
curl::curl_download(url = edi_url,
                    destfile = "ER_contour.csv",
                    quiet = F)

df <- readr::read_csv("ER_contour.csv")

# Getting multiple files -----------------------------------------

# If you would like to download the entire data package as a zip file,
# use EDIutils::read_data_package_archive()

# Create an empty folder to store the zip file in
dir.create(path = "edi_data")

# Download the data package by specifying the package ID number
# The package ID is listed on the landing page of every data package
EDIutils::read_data_package_archive("edi.1790.1", path = "edi_data")

# Unzip the contents into a new "edi.1790.1" folder
unzip(zipfile = file.path("edi_data", "edi.1790.1.zip"),
      exdir = file.path("edi_data", "edi.1790.1"))

## --------------------------------------------- ##
#                KNB example -----
## --------------------------------------------- ##

# Getting a single file ------------------------------------------

# This method works for KNB repositories as well!
# Let's get Everglades_Aquatic_Metabolism_SRS_2.csv from this KNB package:
# https://doi.org/10.5063/JQ0ZDM

# First specify the direct URL to the data file you want
# You can copy any data file's URL by right-clicking its Download button (appears as a cloud icon),
# and then selecting "Copy Link Address"

# Paste the direct URL to Everglades_Aquatic_Metabolism_SRS_2.csv
knb_url <- "https://knb.ecoinformatics.org/knb/d1/mn/v2/object/urn%3Auuid%3A9e3cdf01-47b9-4025-8656-75dcf696a46c"

# Reading directly
df <- readr::read_csv(knb_url)

# Or you can download first, and then read in
curl::curl_download(url = knb_url,
                    destfile = "Everglades_Aquatic_Metabolism_SRS_2.csv",
                    quiet = F)

df <- readr::read_csv("Everglades_Aquatic_Metabolism_SRS_2.csv")

# Getting multiple files -----------------------------------------

# If you would like to download the entire data package as a zip file,
# right-click the data package's Download button (appears as a cloud icon),
# and then select "Copy Link Address"

# Paste the URL to the entire data package
knb_pkg_url <- "https://knb.ecoinformatics.org/knb/d1/mn/v2/packages/application%2Fbagit-1.0/urn%3Auuid%3Ab9539caf-9133-4d93-8099-3a38b1c4d568"

# Create an empty folder to store the zip file in
dir.create(path = "knb_data")

# Download the data package as a zip file
curl::curl_download(url = knb_pkg_url,
                    destfile = file.path("knb_data", "example_knb_pkg.zip"),
                    quiet = F)

# Unzip the contents into a new "example_knb_pkg" folder
unzip(zipfile = file.path("knb_data", "example_knb_pkg.zip"),
exdir = file.path("knb_data", "example_knb_pkg"))Additional Resources: Data Publication
Overview
A research project can involve multiple moving parts that could get lost if there isn’t a plan in place to manage how your research will be preserved and reused. This page will get you familiarized with the best practices of data management/publication, and serves as a quick-start guide to the EDI and KNB data repositories.
Some content on this page have been adapted from NCEAS’ coreR for Delta Science Program.
Data Life Cycle
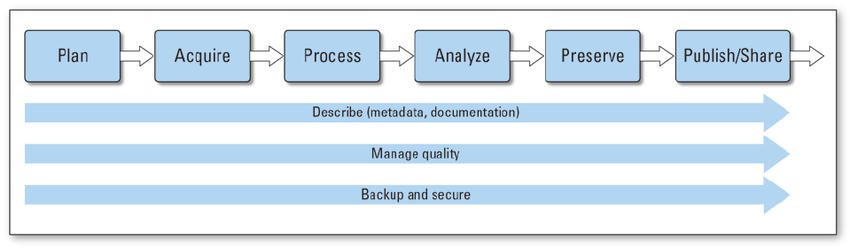
As you begin a research project, your data may go through lots of stages in its life cycle. Like the diagram from Faundeen et al 2013 shows, the first stage starts with planning out goals you want to accomplish or research questions you want to answer. Consider the resources (data, funding, personnel) you will need.
With a plan in mind, the second stage of the data life cycle involves identifying and evaluating new or existing data sources to be collected/generated/re-used. You might acquire datasets at one of the many data repositories out there. At the next stage, these data inputs will be processed through data cleaning and wrangling.
Once the data is processed, it will be ready for analysis, where new insights are generated. Be sure to document the processes that were involved, for example, recording the methods and organizing files to ensure that your workflow is reproducible.
As the research project nears its end, consider how you will preserve your data products for the long-term, especially if it’s required by your funding. If you are planning to submit your data/code for archival at a data repository, plan what metadata and documentation you will need to ensure your results will be accessible and reusable for the future. Each repository will have slightly different requirements, but check out the next few sections to learn more about what data publication at EDI and KNB entails.
Last but not least, once your data is published with a DOI (digital object identifier), other researchers will be able to use and cite your work in the future, which in turn, will expose your research to an even wider audience.
You may have also noticed three arrows cutting across the diagram. These steps should always be kept in mind when you’re progressing your research in order to manage your data effectively.
As you’re working, describe your data products by documenting its metadata. Metadata, or data about data, is a critical component of data reusability. More on metadata below. Additionally, have some quality control techniques in place so that the values of your output are expected. This helps to ensure that your workflow will run as intended. Finally, it never hurts to backup your data regularly to protect it from unexpected data losses due to software failures or natural disasters.
Metadata
As mentioned, metadata plays an important role in the data life cycle, yet it’s often overlooked. Metadata is crucial to understanding, interpreting, and reusing datasets. It contains information on what was measured, who made the measurements, when and where were measurements made, and why was the data collected. The point is to have enough metadata so that anyone (even you) can reuse the data far into the future.
If you are submitting your dataset/code to a data repository, you will need to create metadata that documents all the details about the data itself. One popular, standard format for metadata files in the field of environmental sciences is EML, Ecological Metadata Language. This format arranges the metadata into an organized, machine-readable set of elements.
There are many ways to create this EML file, such as programmatically through R or by filling out a web form offered by a data repository. EDI and KNB are two data repositories that have the web form option for researchers to generate their metadata file.
EDI Quick-Start Guide
EDI, or the Environmental Data Initiative, is a DataONE data repository that hosts ecological and environmental data for the long-term. They have staff to support curation efforts and work closely with the LTER Network to promote best practices for FAIR (Findable, Accessible, Interoperable, and Reusable) data.
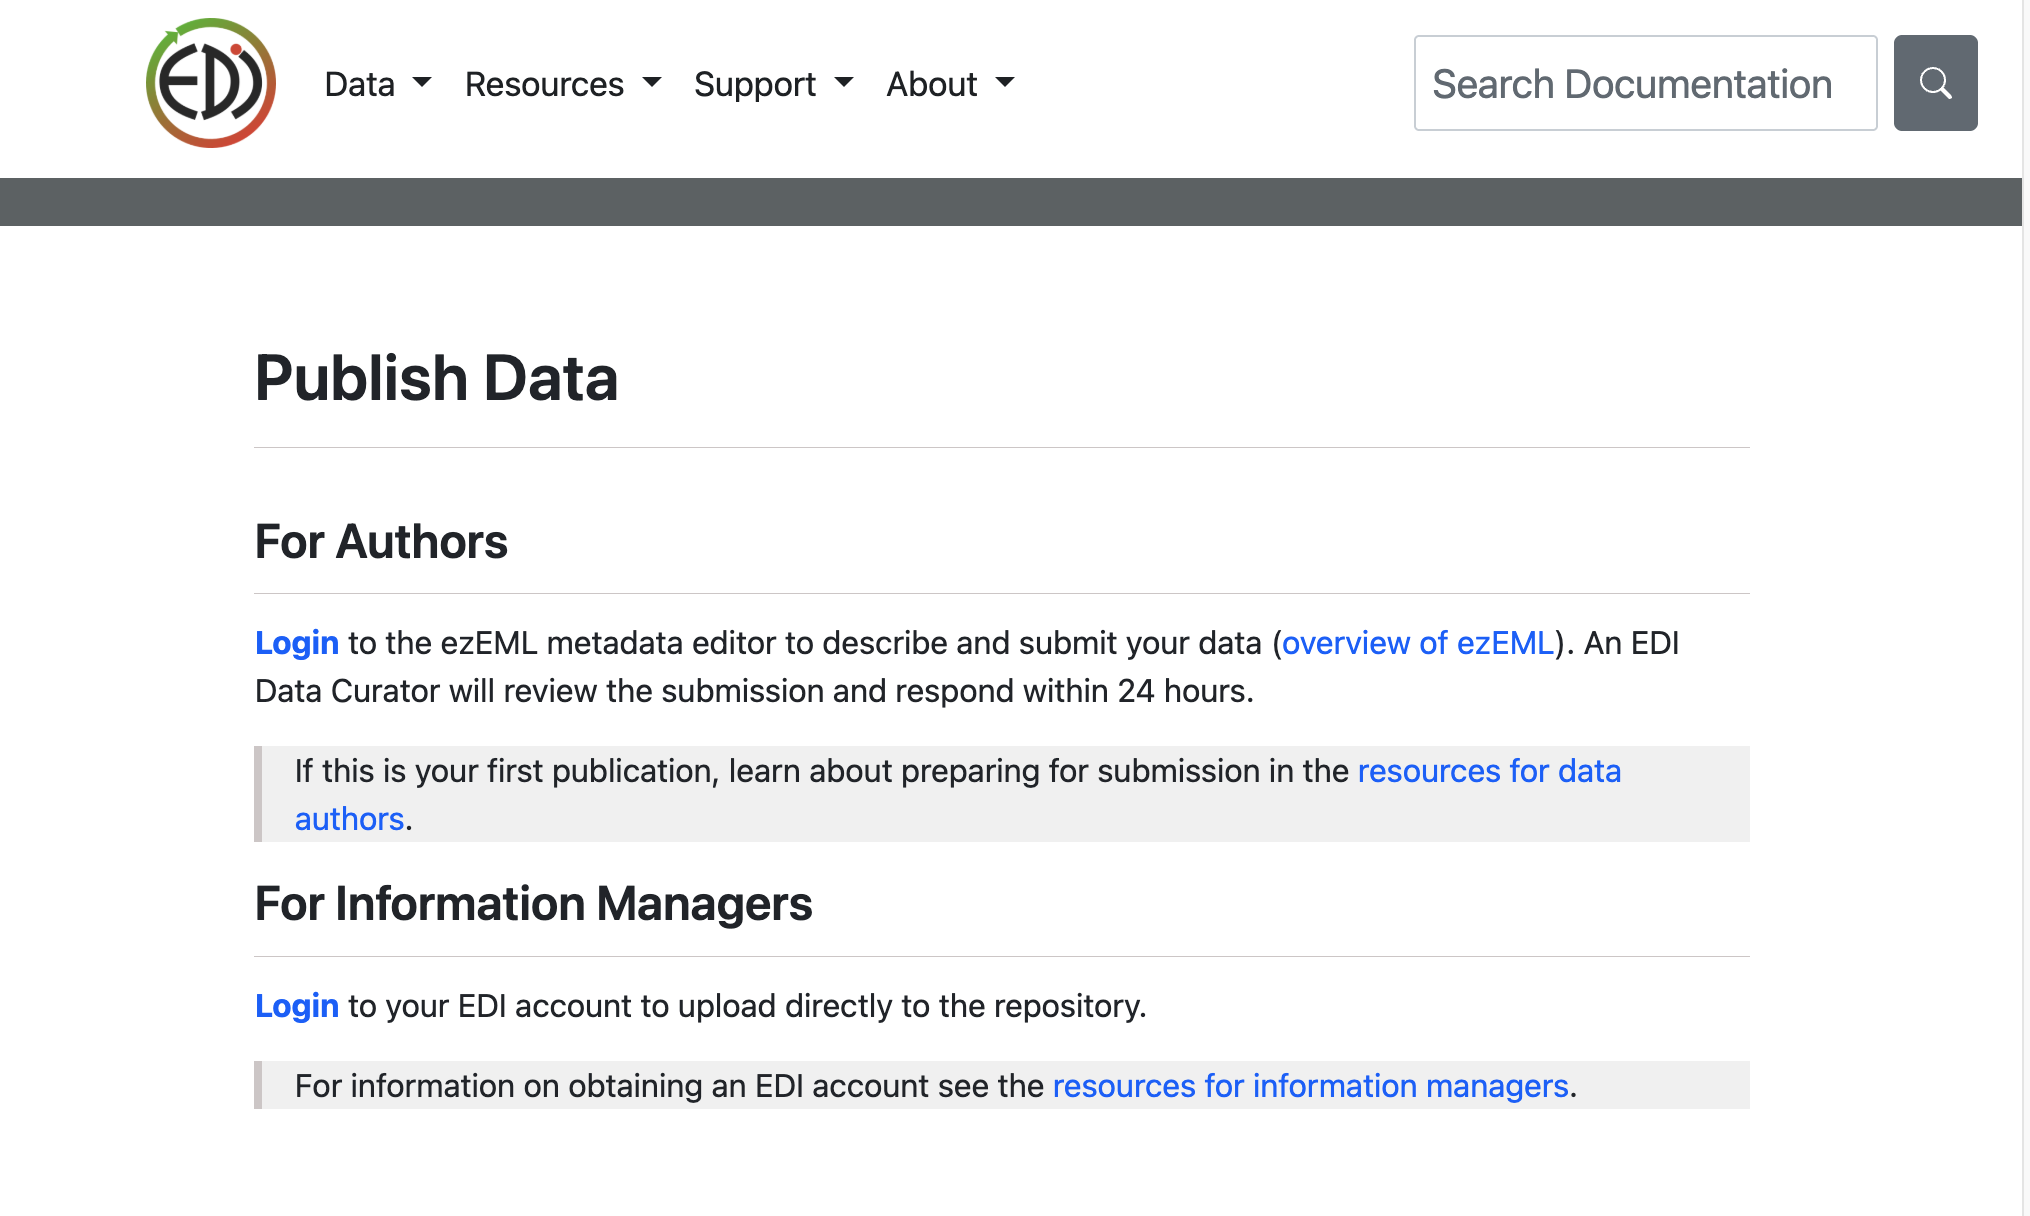
To get started with your data package submission, navigate to the Publish Data page in EDI. Click to login to their ezEML metadata editor. ezEML is EDI’s easy-to-use web-based tool for creating metadata.
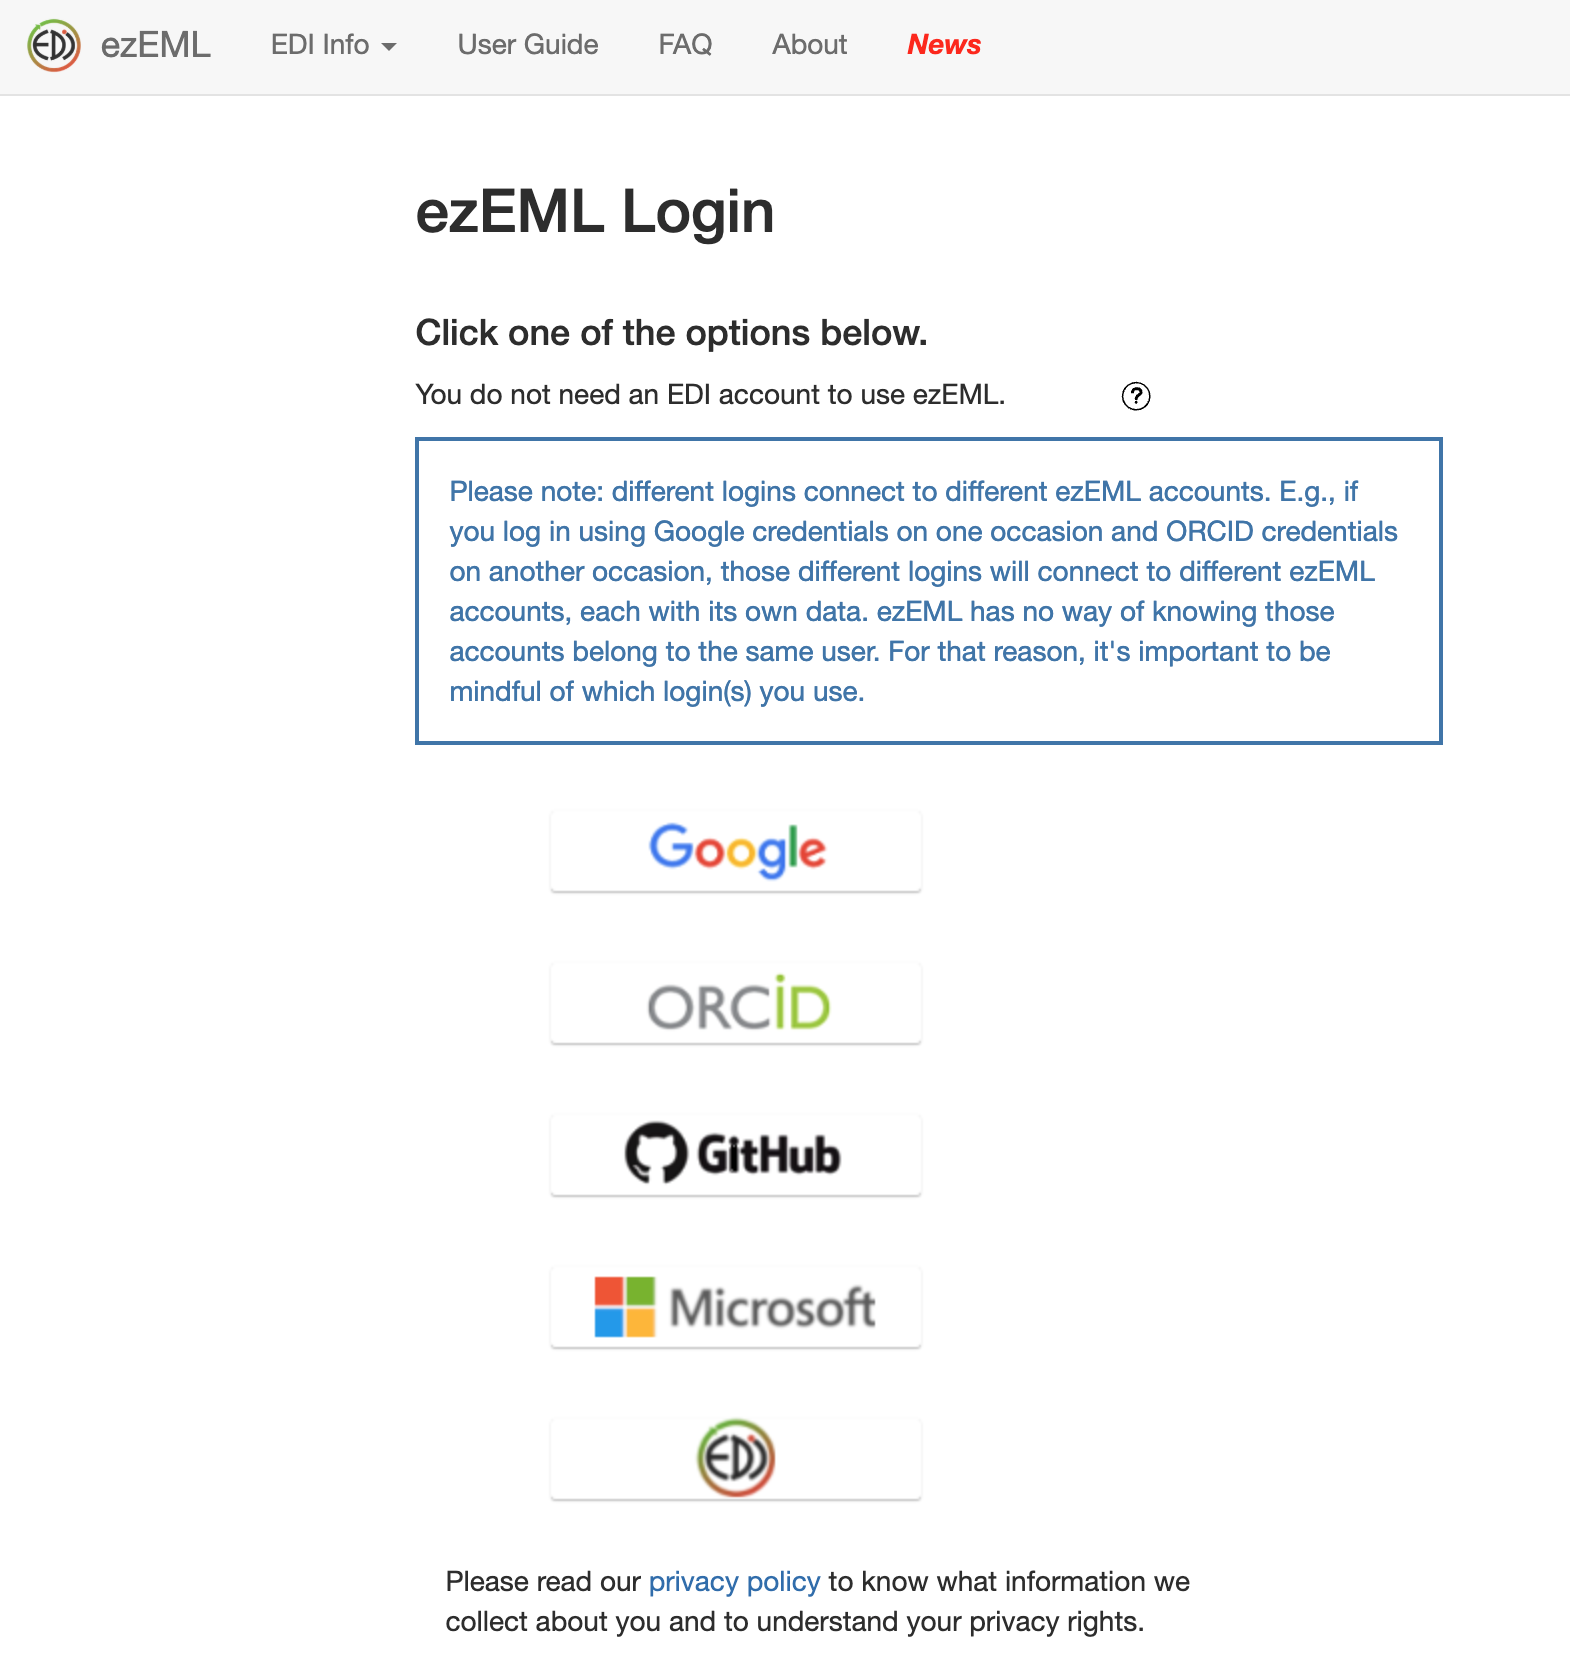
Choose one of the many options to login to ezEML. You will want to stay consistent with the account that you’re using to login because your submissions will only be associated to the account you used to login.
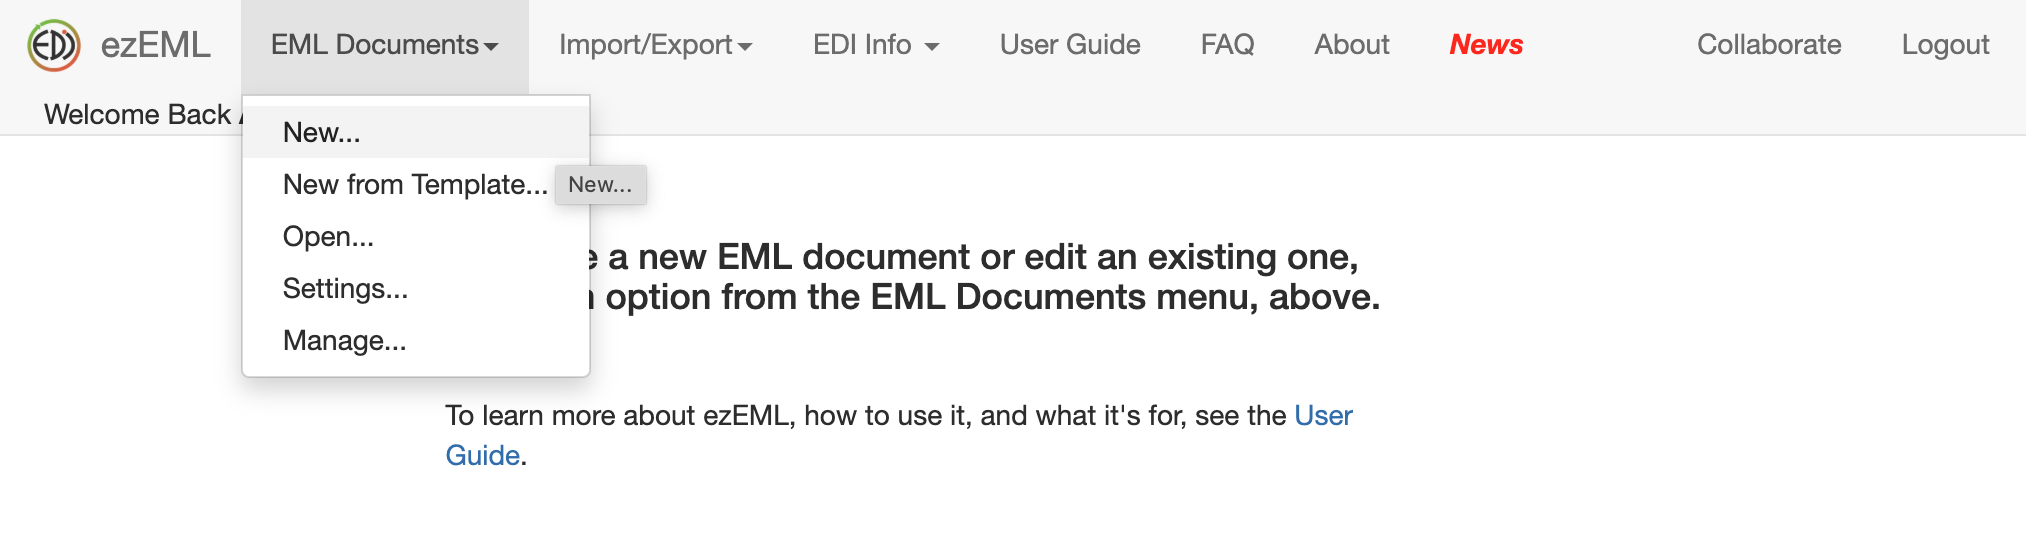
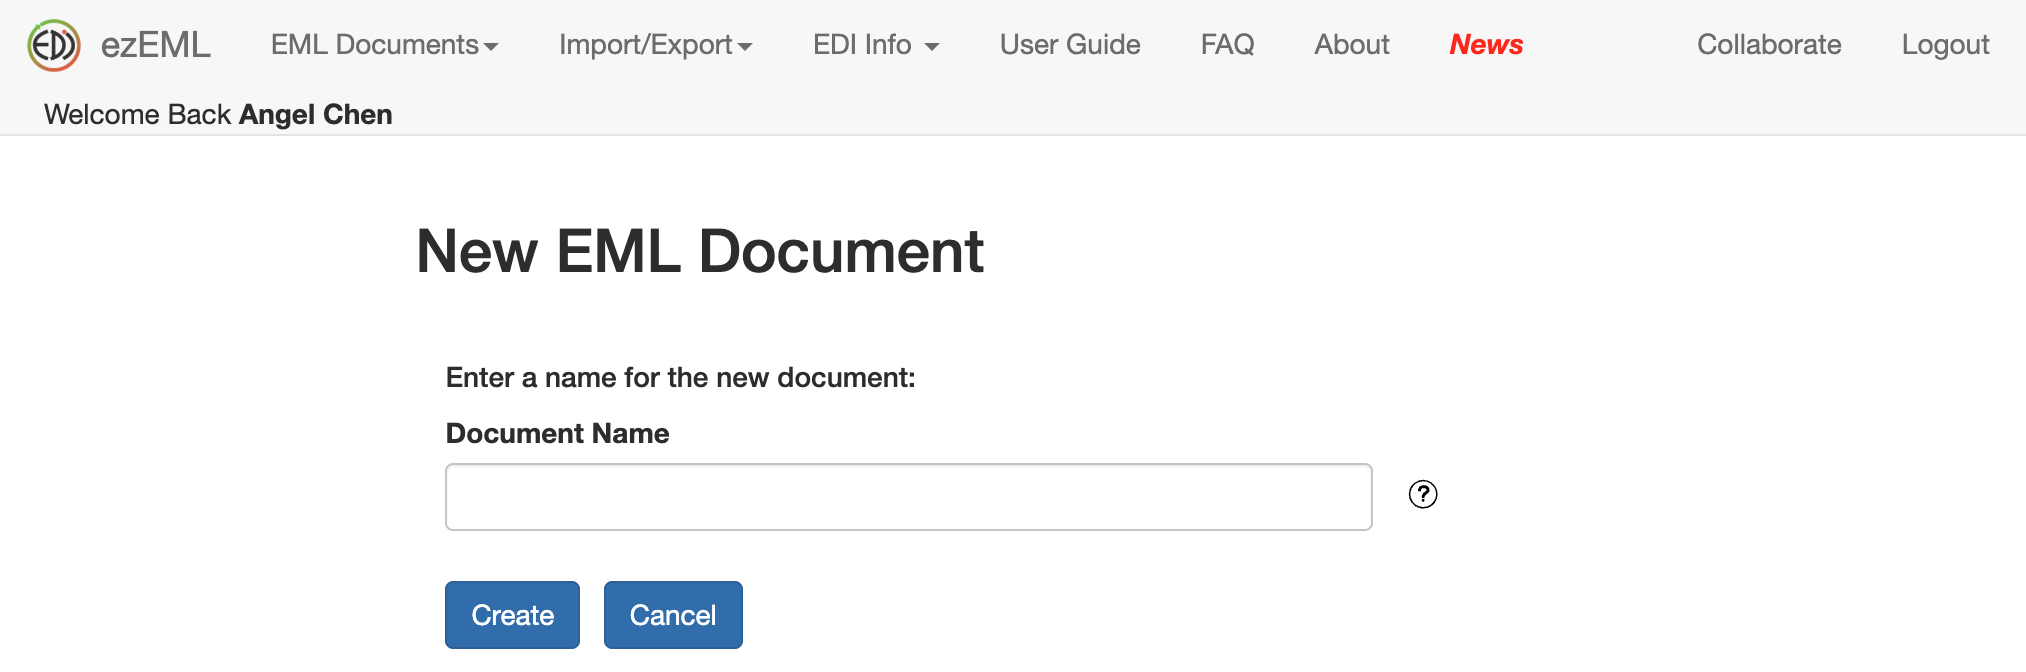
Once you’ve logged in, click on EML Documents then New.. to start a new EML document.
You will be prompted to enter a name for your metadata document. Enter a unique, memorable name.
Then you will be presented with a form to fill out all the information about your data, such as the Title, Data Tables, Creators, Contacts, etc. Be as descriptive as you can. Don’t worry about filling it all out in one sitting. The information you enter will be saved as you go, and you can always return to your metadata document to continue where you’ve left off.

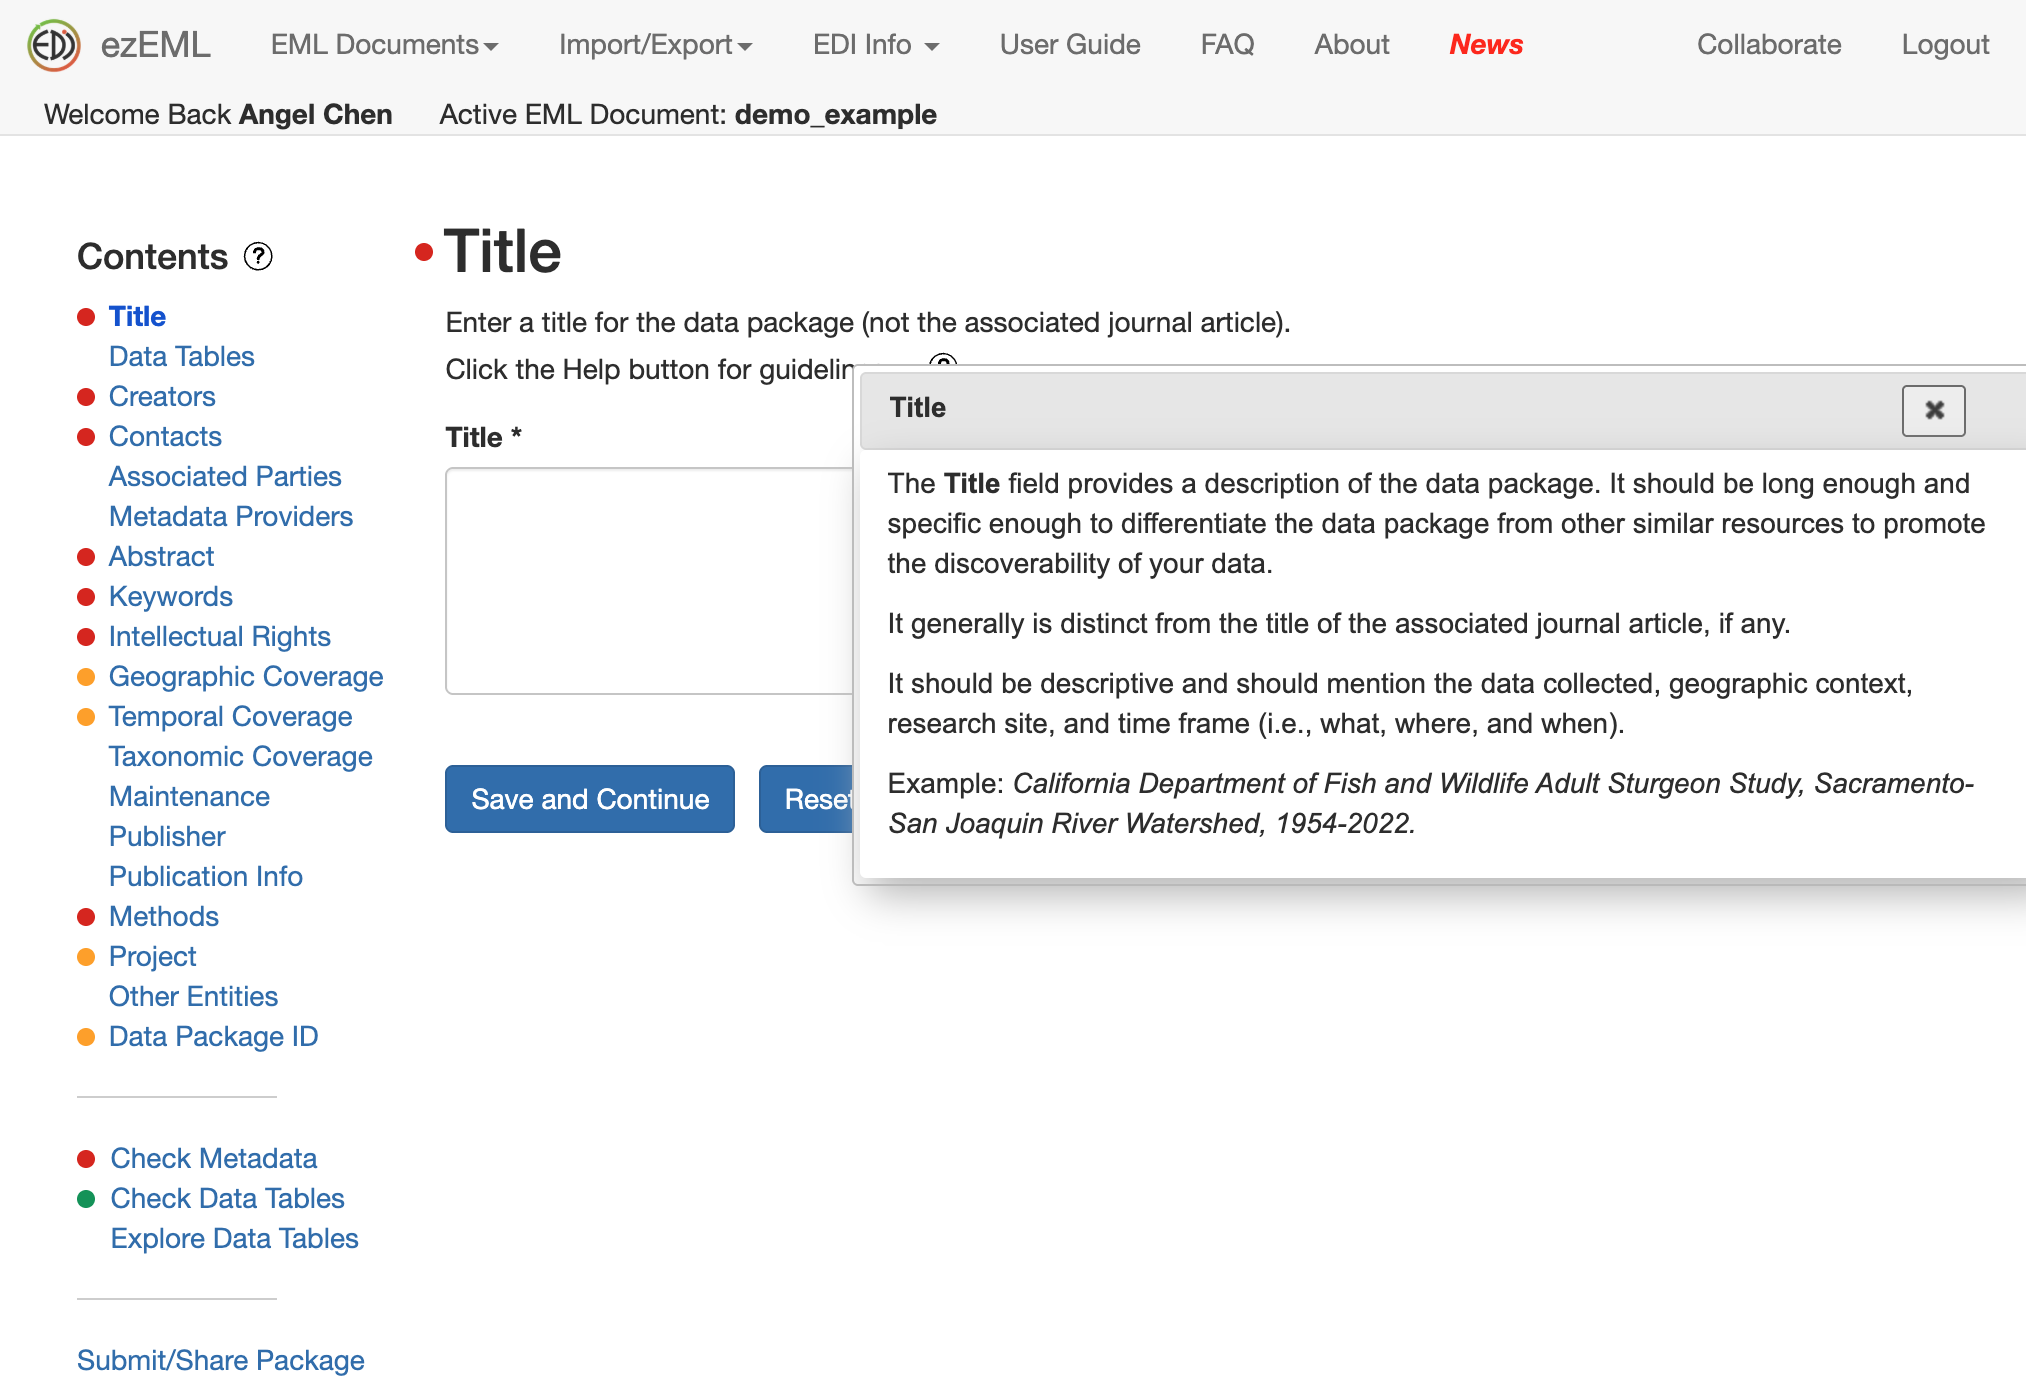
If you’re not sure how to fill out a section, click on the question mark to get helpful tips.
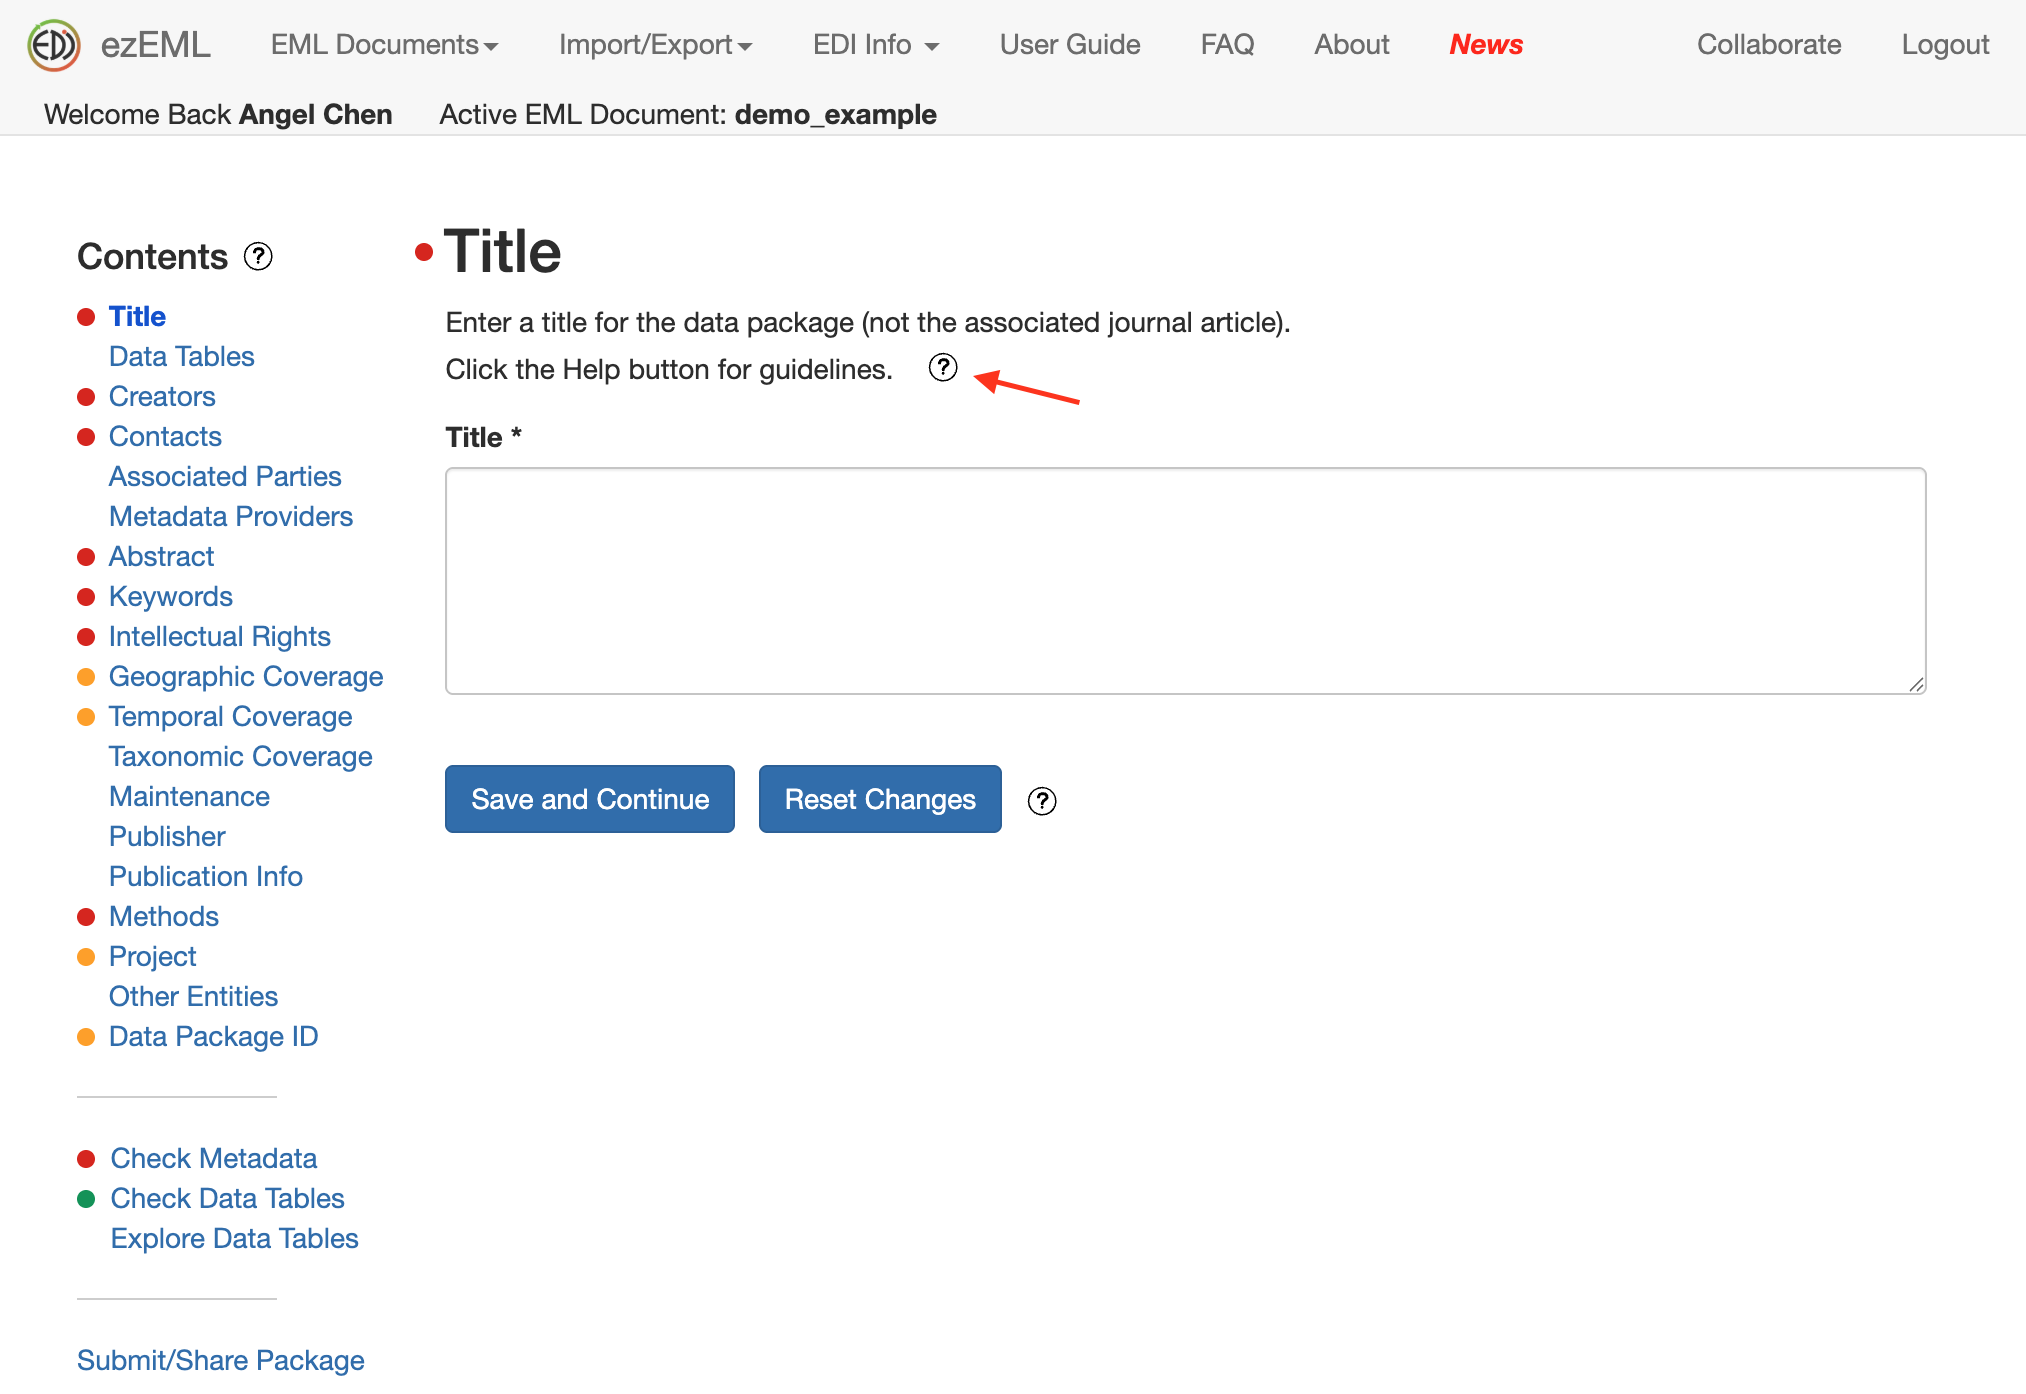
In the screenshot below, a pop-up appeared on how to best come up with a Title for your data package.
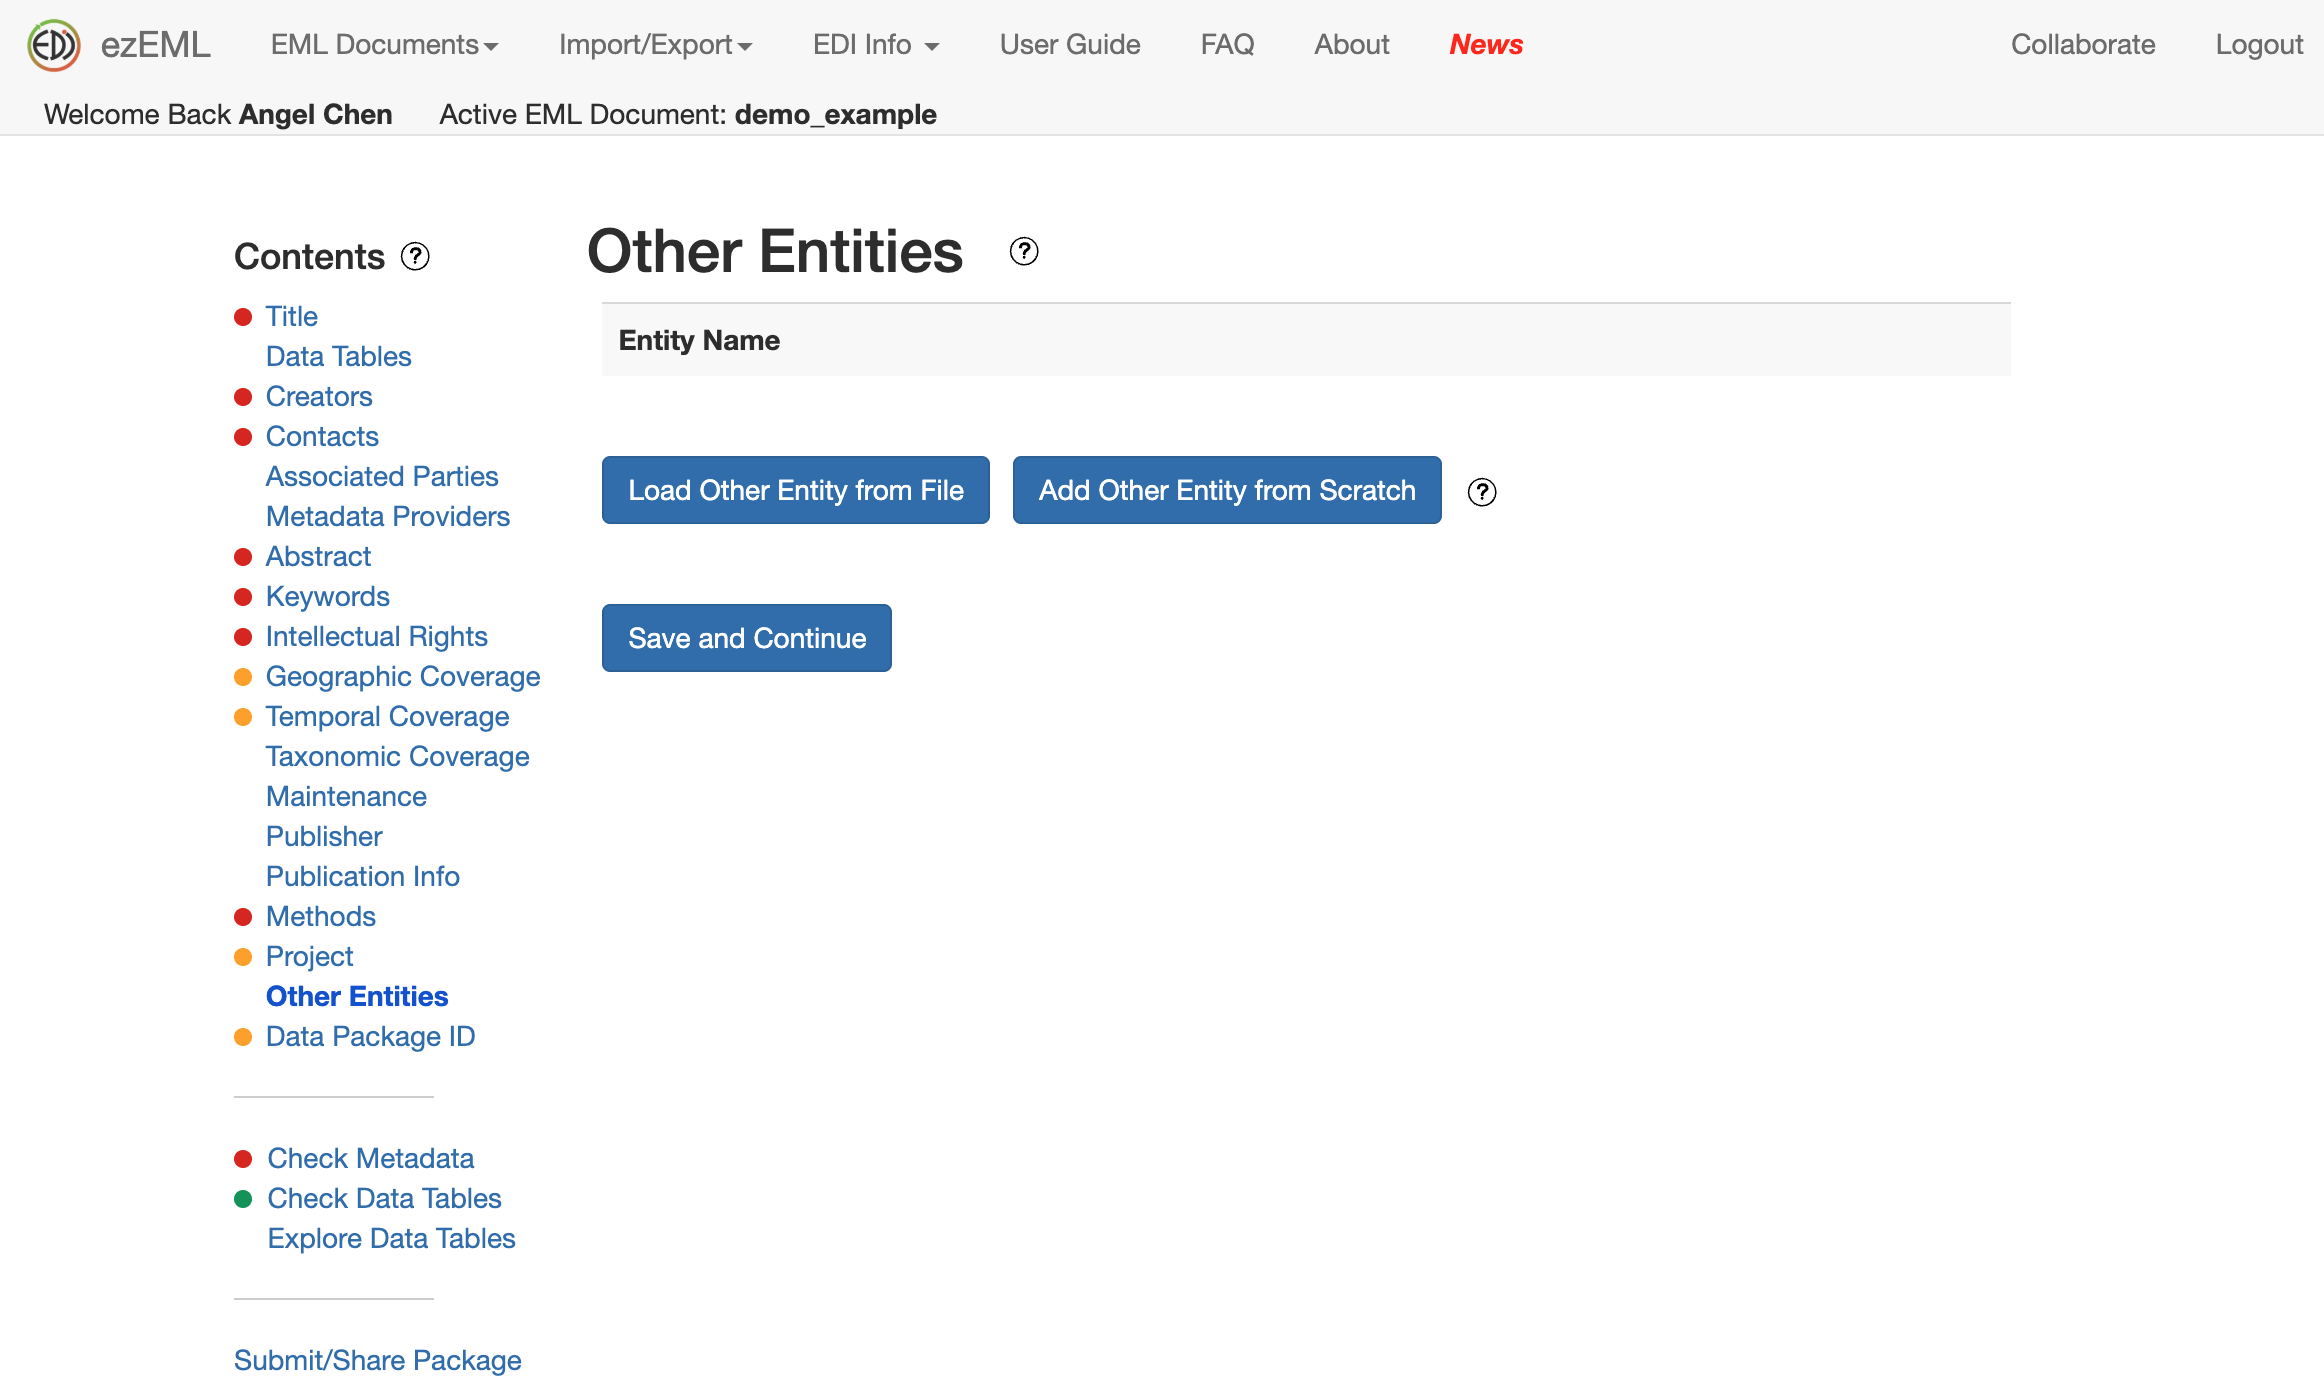
If you have tabular data in CSV files, you can upload them in Data Tables and EDI will automatically infer many attributes about your data, like column names, so you can save some time on manually filling out information. Be sure to double-check the metadata so everything looks correct.

For all other types of data, you can upload them in Other Entities and fill out the metadata as appropriate.
For extra help, check out the ezEML User Guide or email EDI for support. You can also watch their YouTube tutorial below.
Once you’re done filling out the sections to the best of your ability, click on Submit/Share Package to submit your data package for the EDI team to review. When you’re submitting for review, there’s an option to add a message to your submission. If you wish for your data to be embargoed, you should mention it here.
The EDI team will respond back to you via email with any additional suggestions/edits or the greenlight to publish your data package with a DOI if everything looks good.
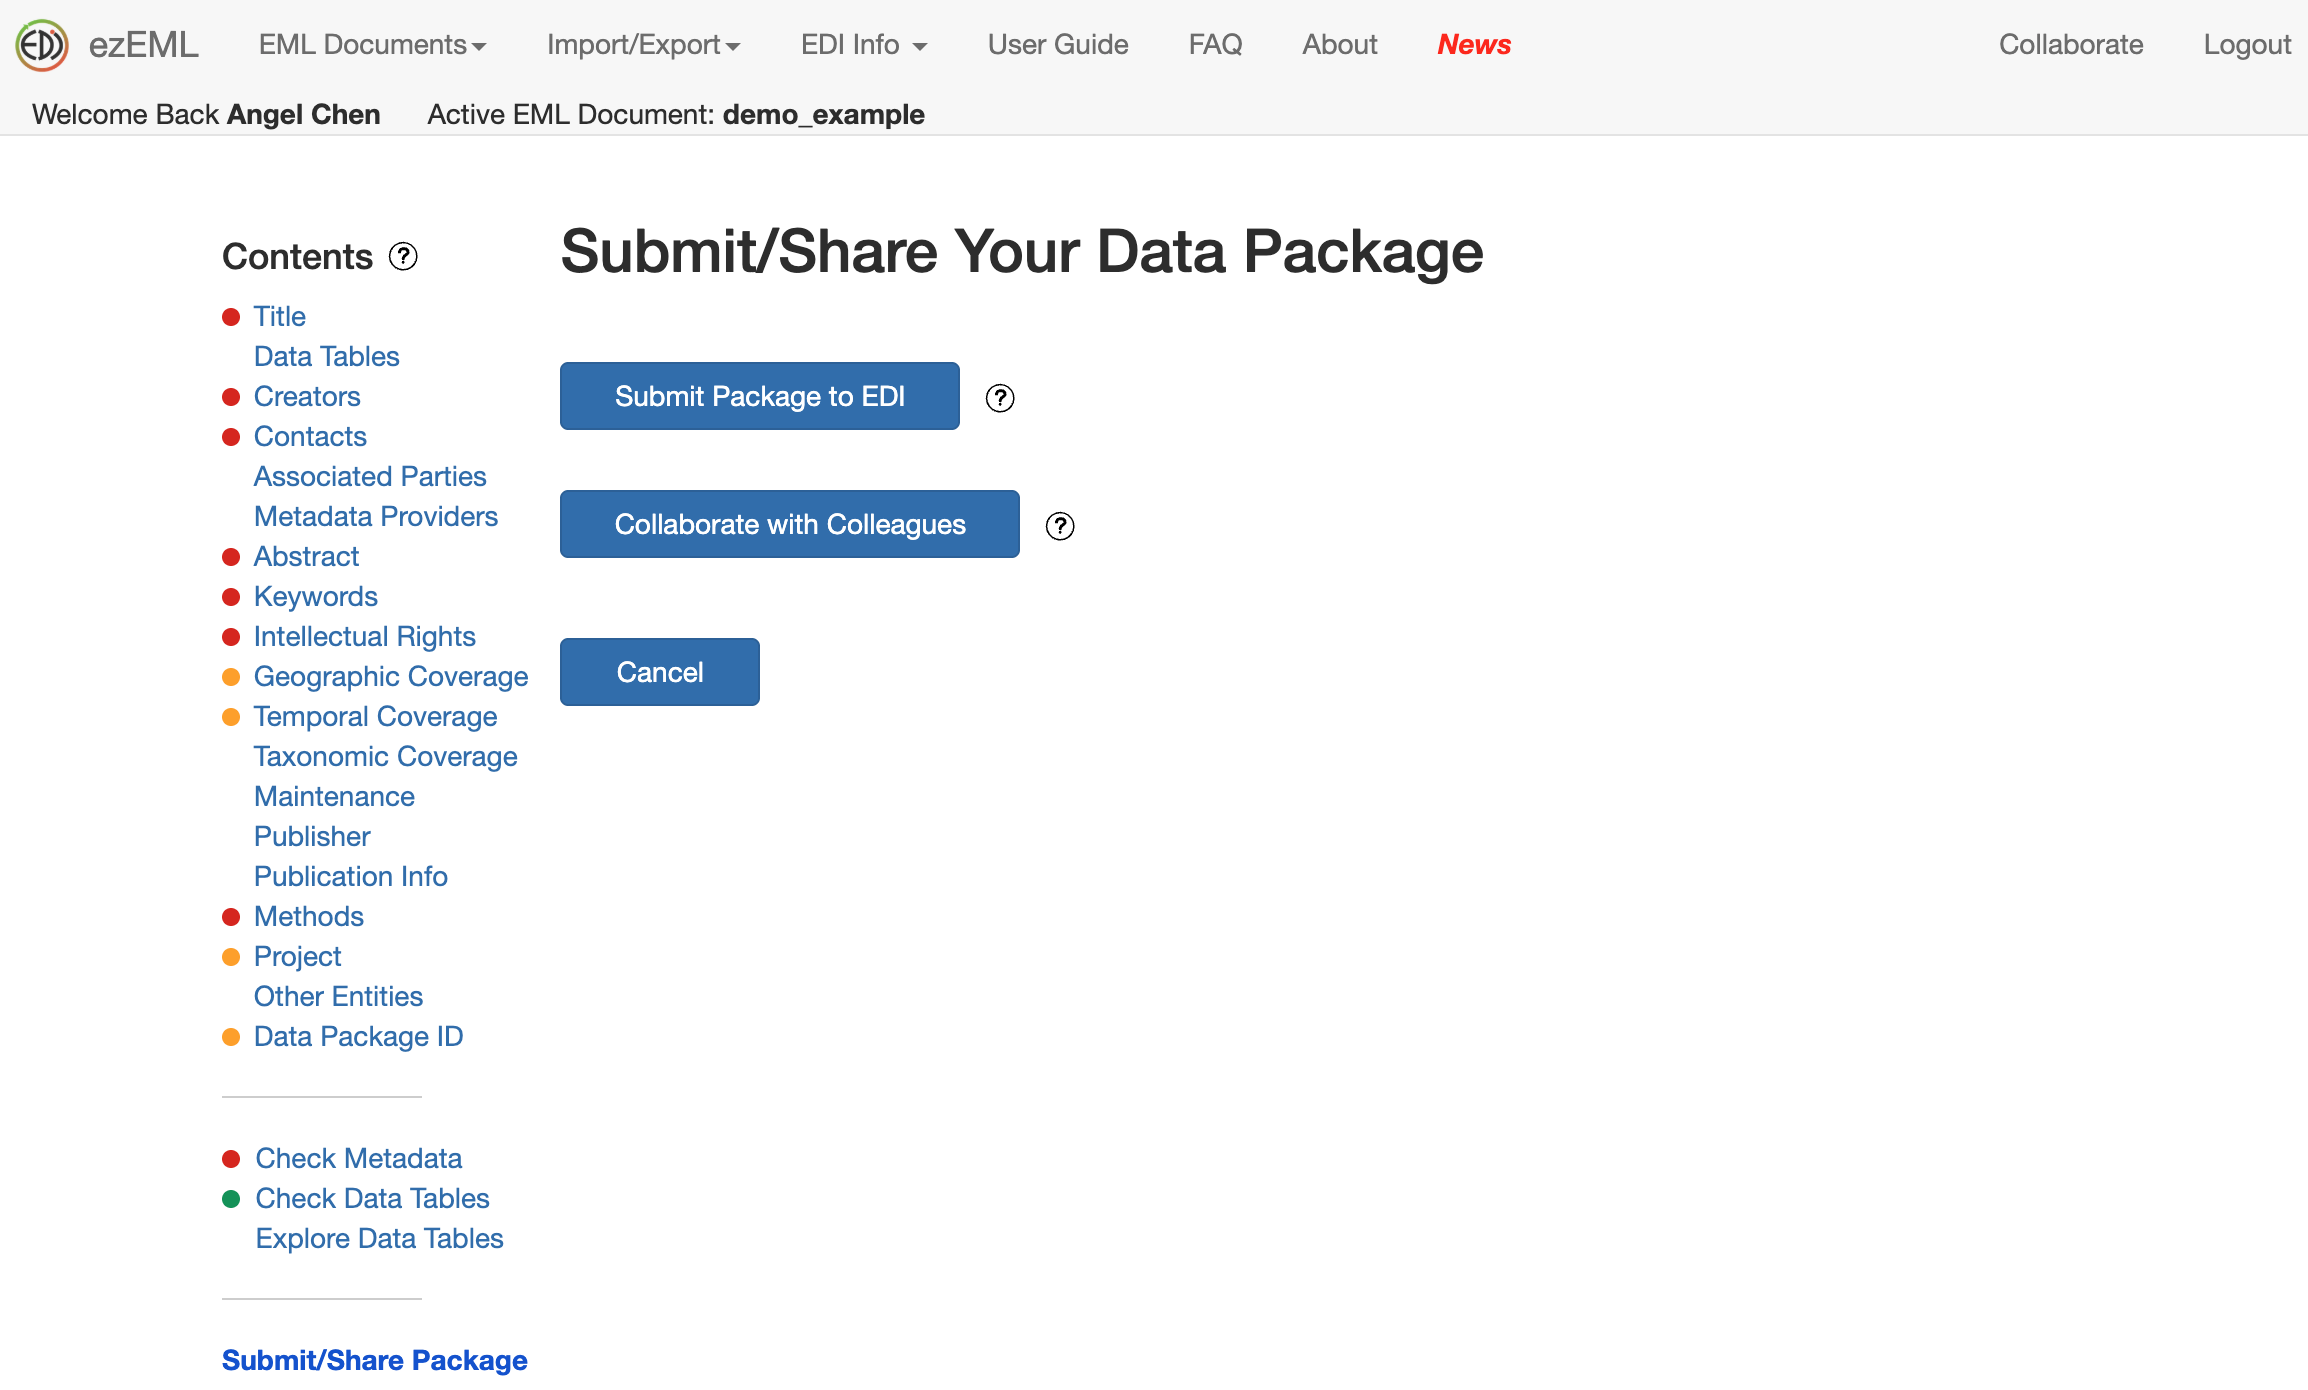
There’s also an option on this page to invite your colleagues to collaborate on editing the metadata. Be aware that only one person can edit the metadata at a time.
When your data is published with a DOI, the landing page for your data package may look something like this:

The full metadata will be available under View Full Metadata. With this, your data will be available for reuse!
KNB Quick-Start Guide
Just like EDI, KNB, or the Knowledge Network for Biocomplexity, is another DataONE data repository that preserves ecological and environmental data for the long-term. They are hosted by NCEAS and abide by the FAIR (Findable, Accessible, Interoperable, and Reusable) data principles.
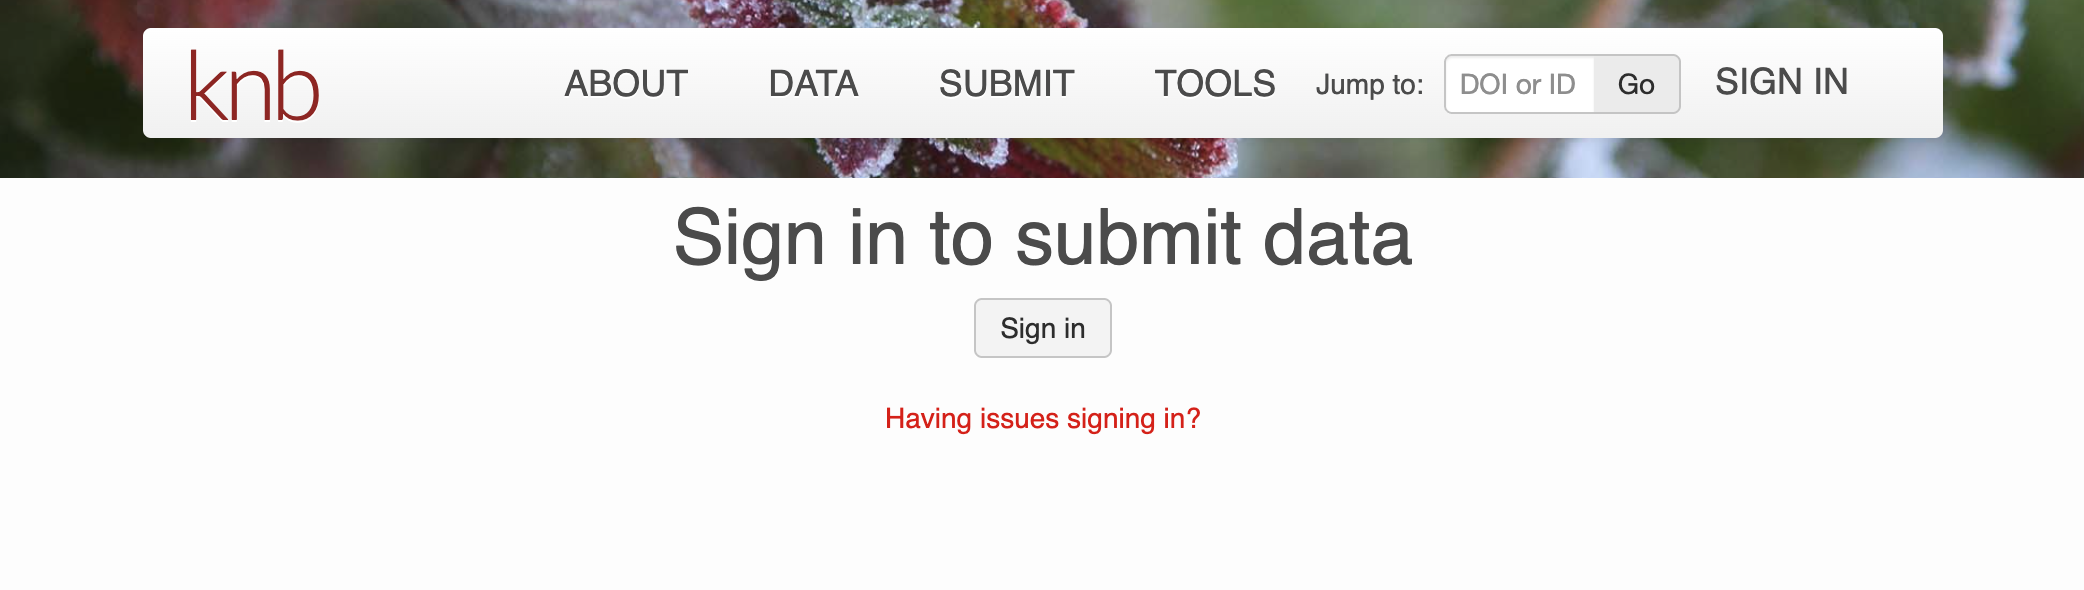
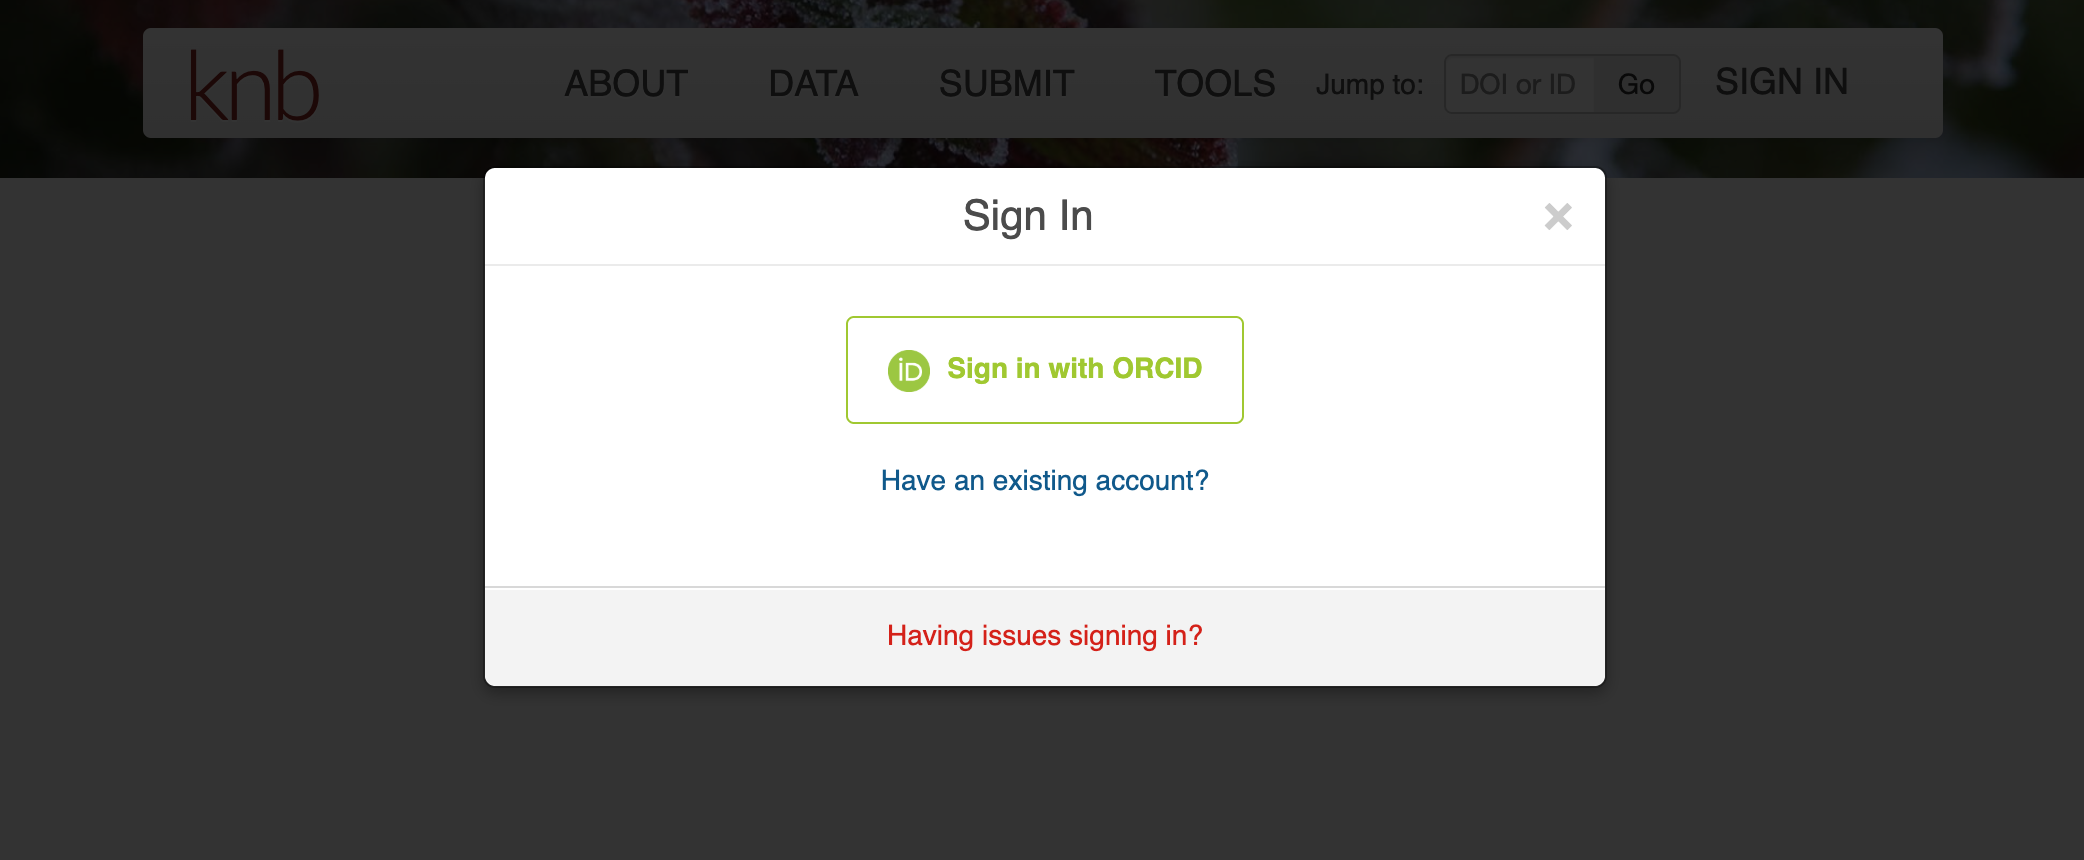
Navigate to the Submit page to get started on your submission. It will prompt you to sign-in through your ORCID account if you’re not already signed-in. Be sure to create an ORCID account if you don’t have one already. It will help you keep track of the products of your research.
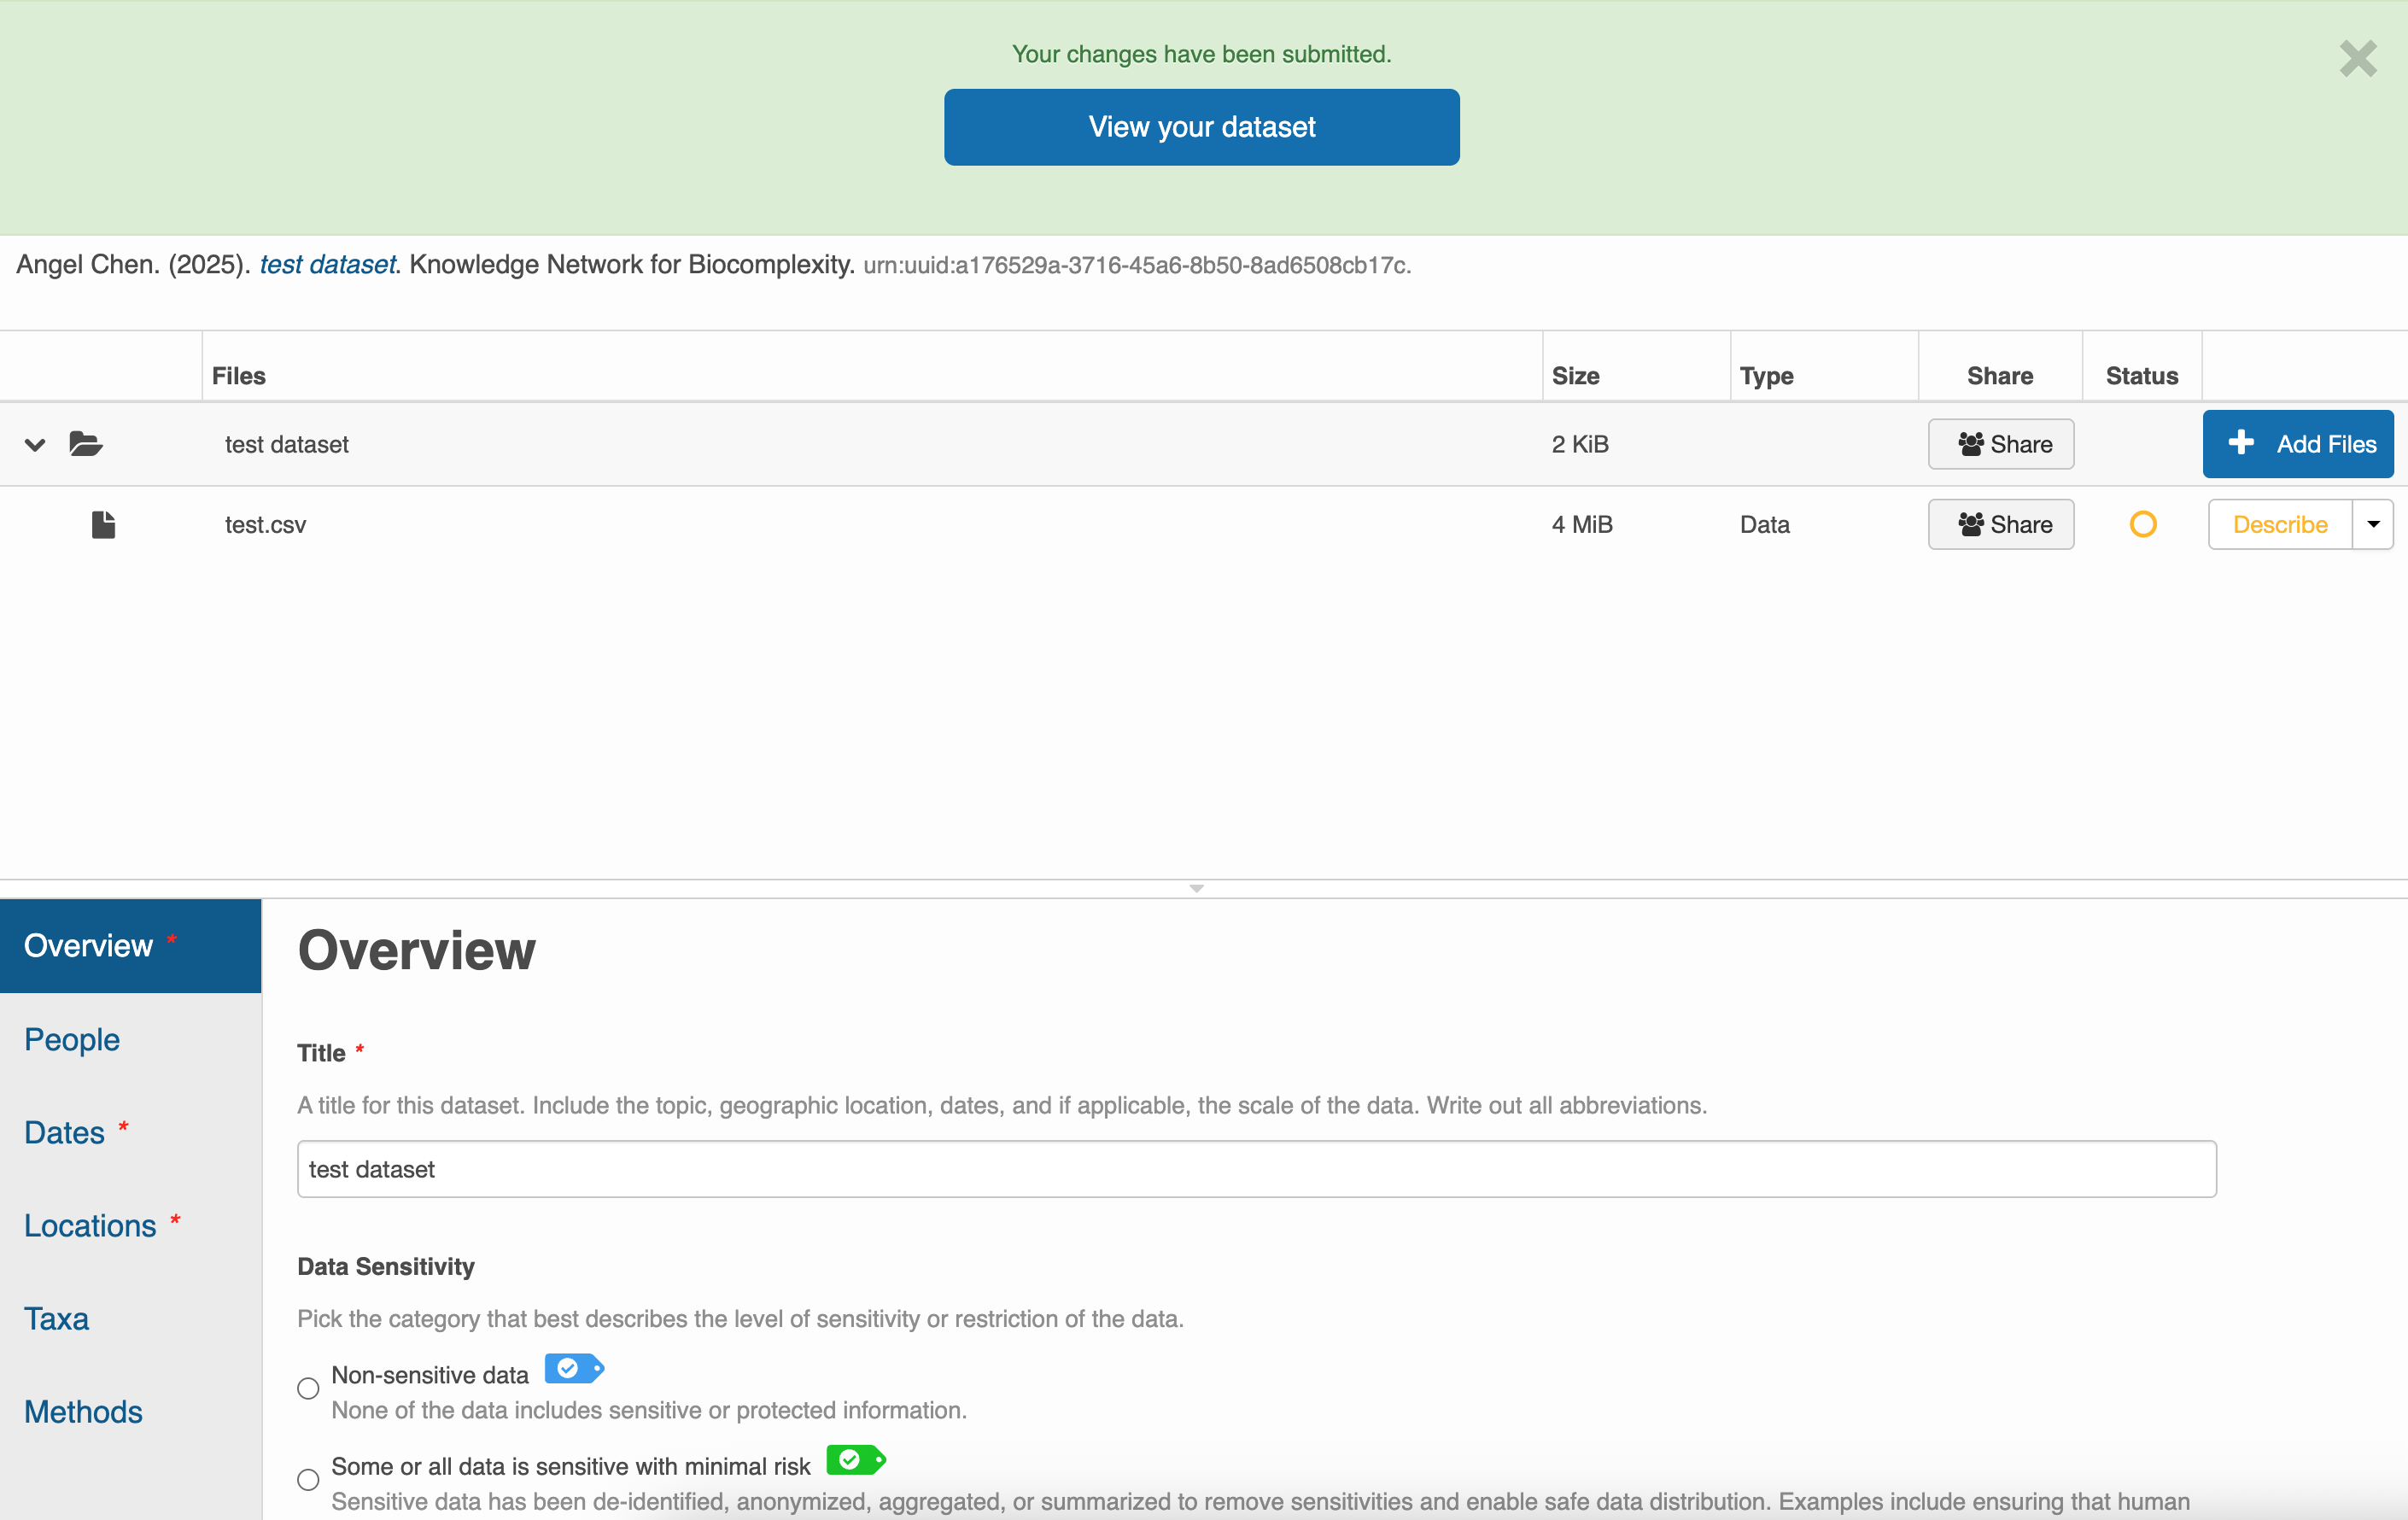
Once you’ve signed-in, the Submit page will direct you to fill out a web form. The top half of the form is for uploading and describing your data files while the bottom half is for the other metadata fields like Overview, People, Dates, Locations, etc.
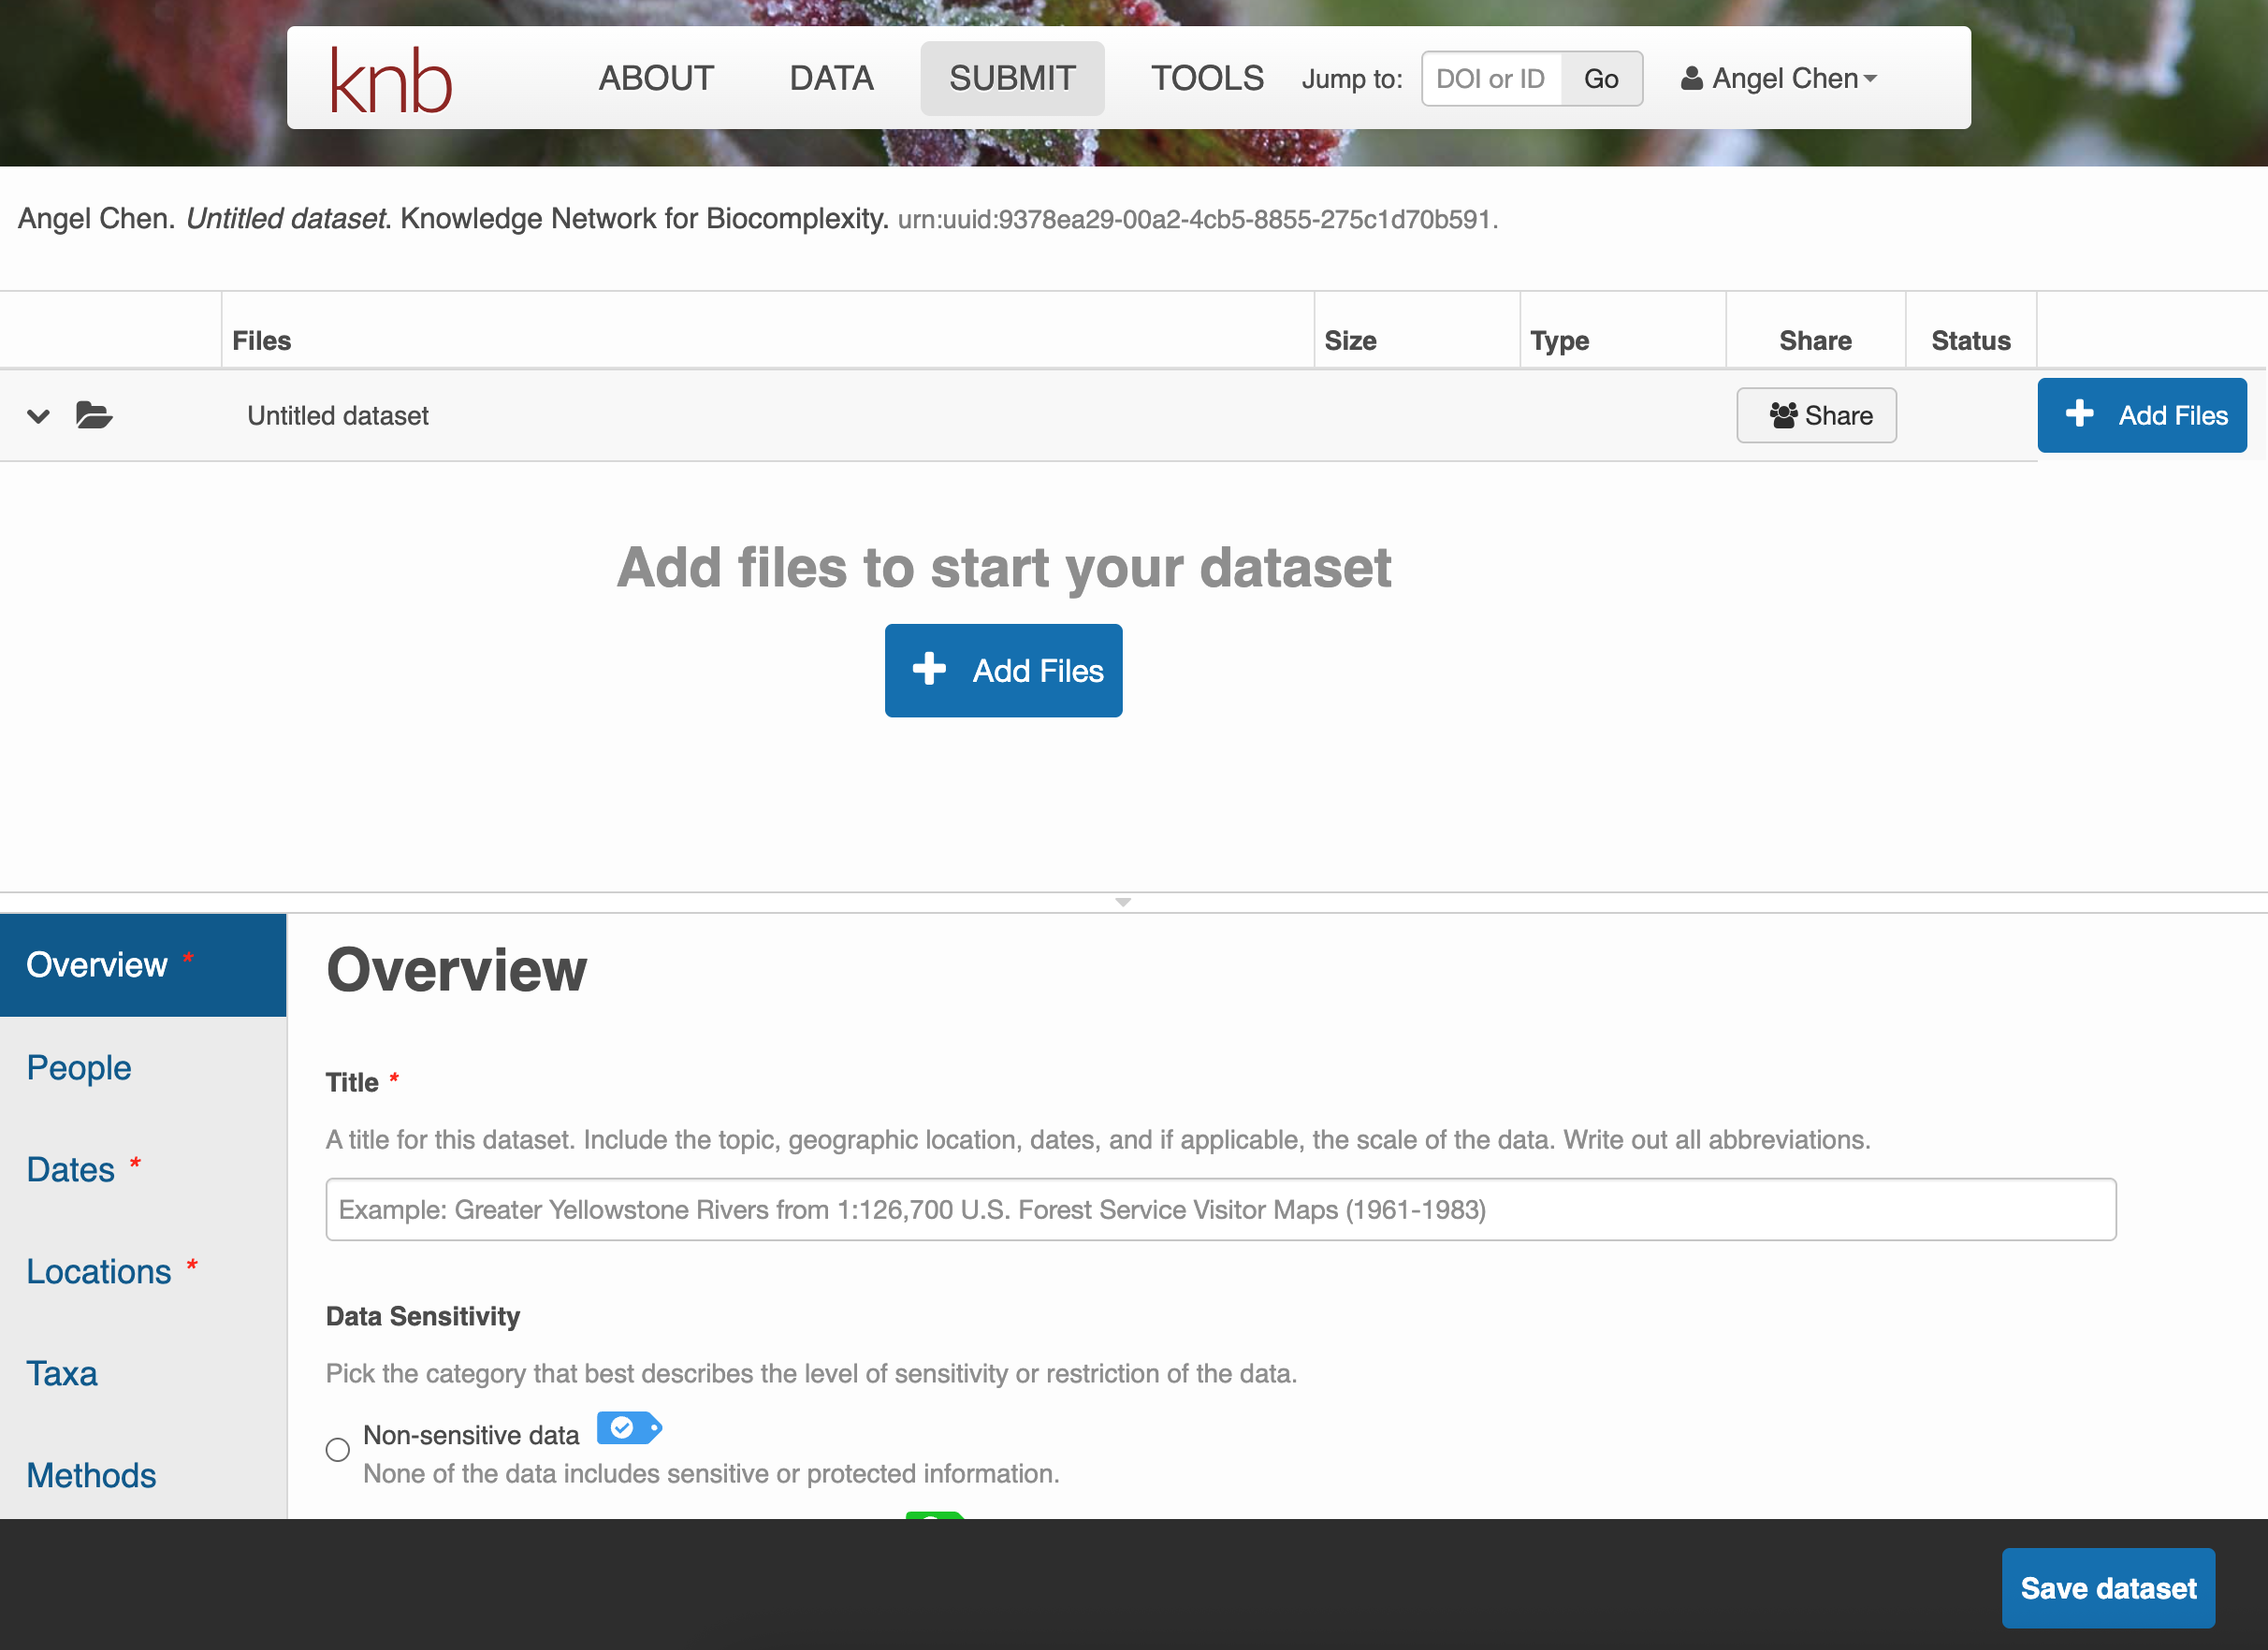
Click on + Add Files to add any data files you wish to submit. Once you have them uploaded, there are options to either Describe, Replace, or Remove the file.
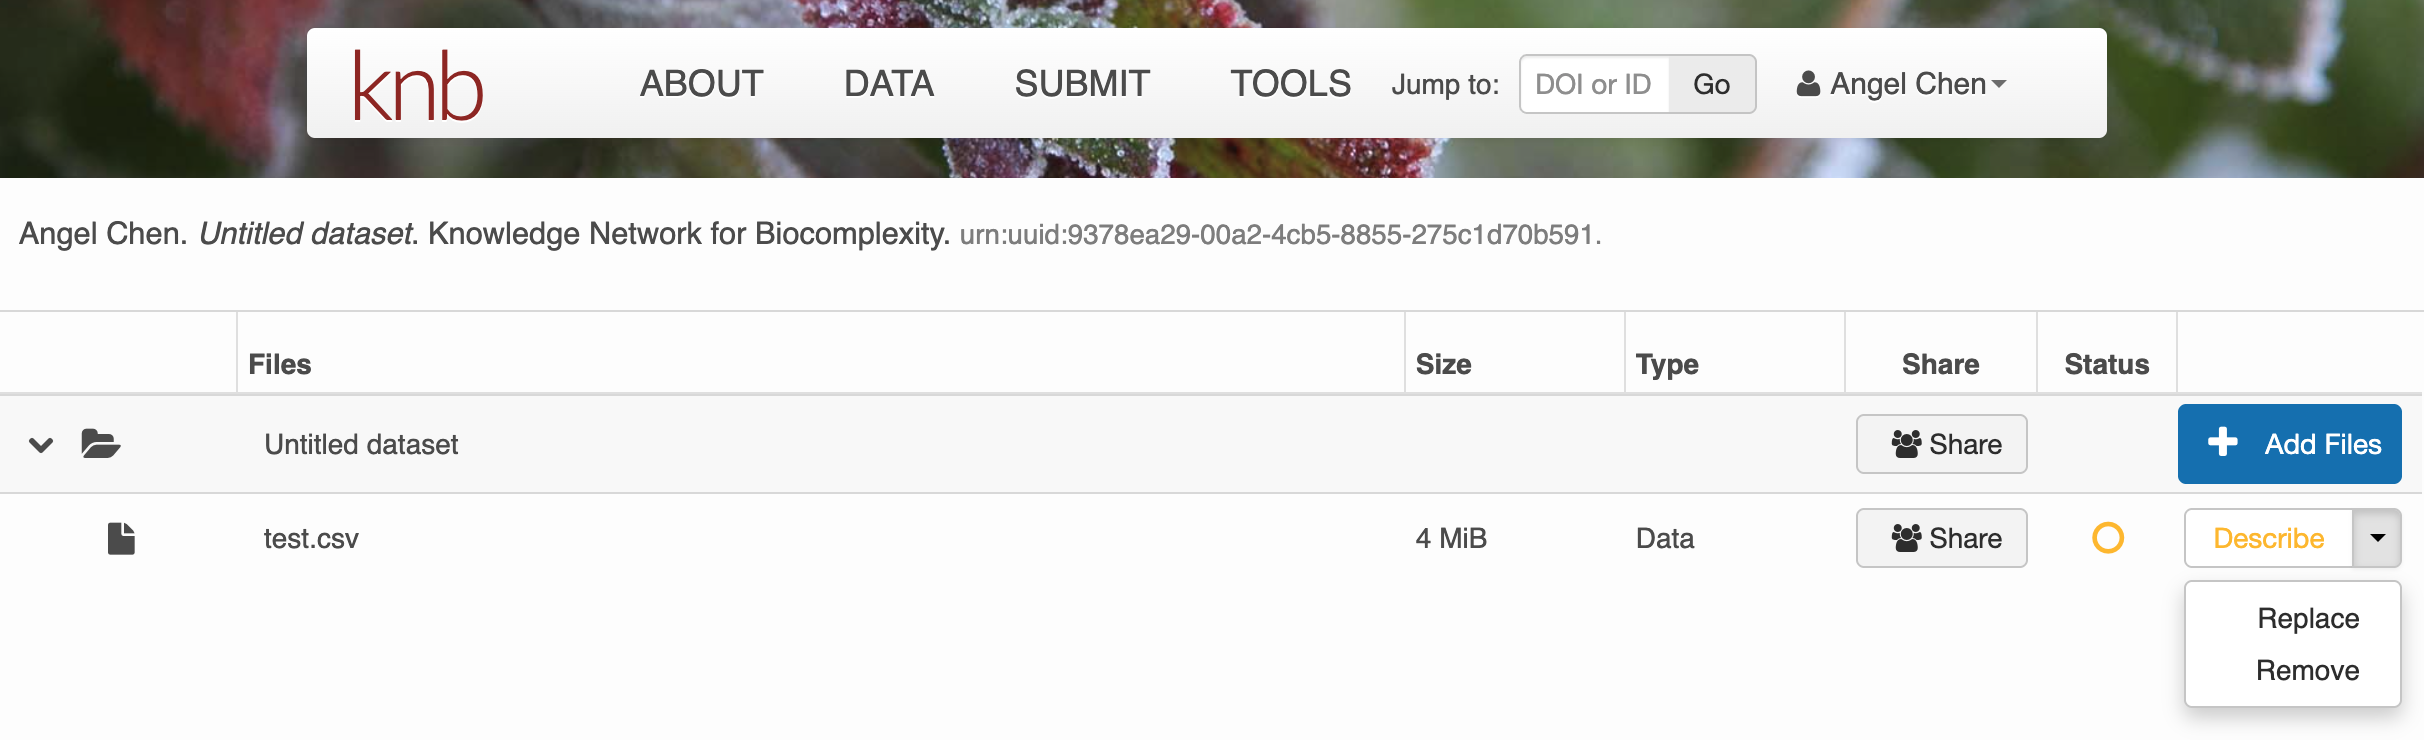
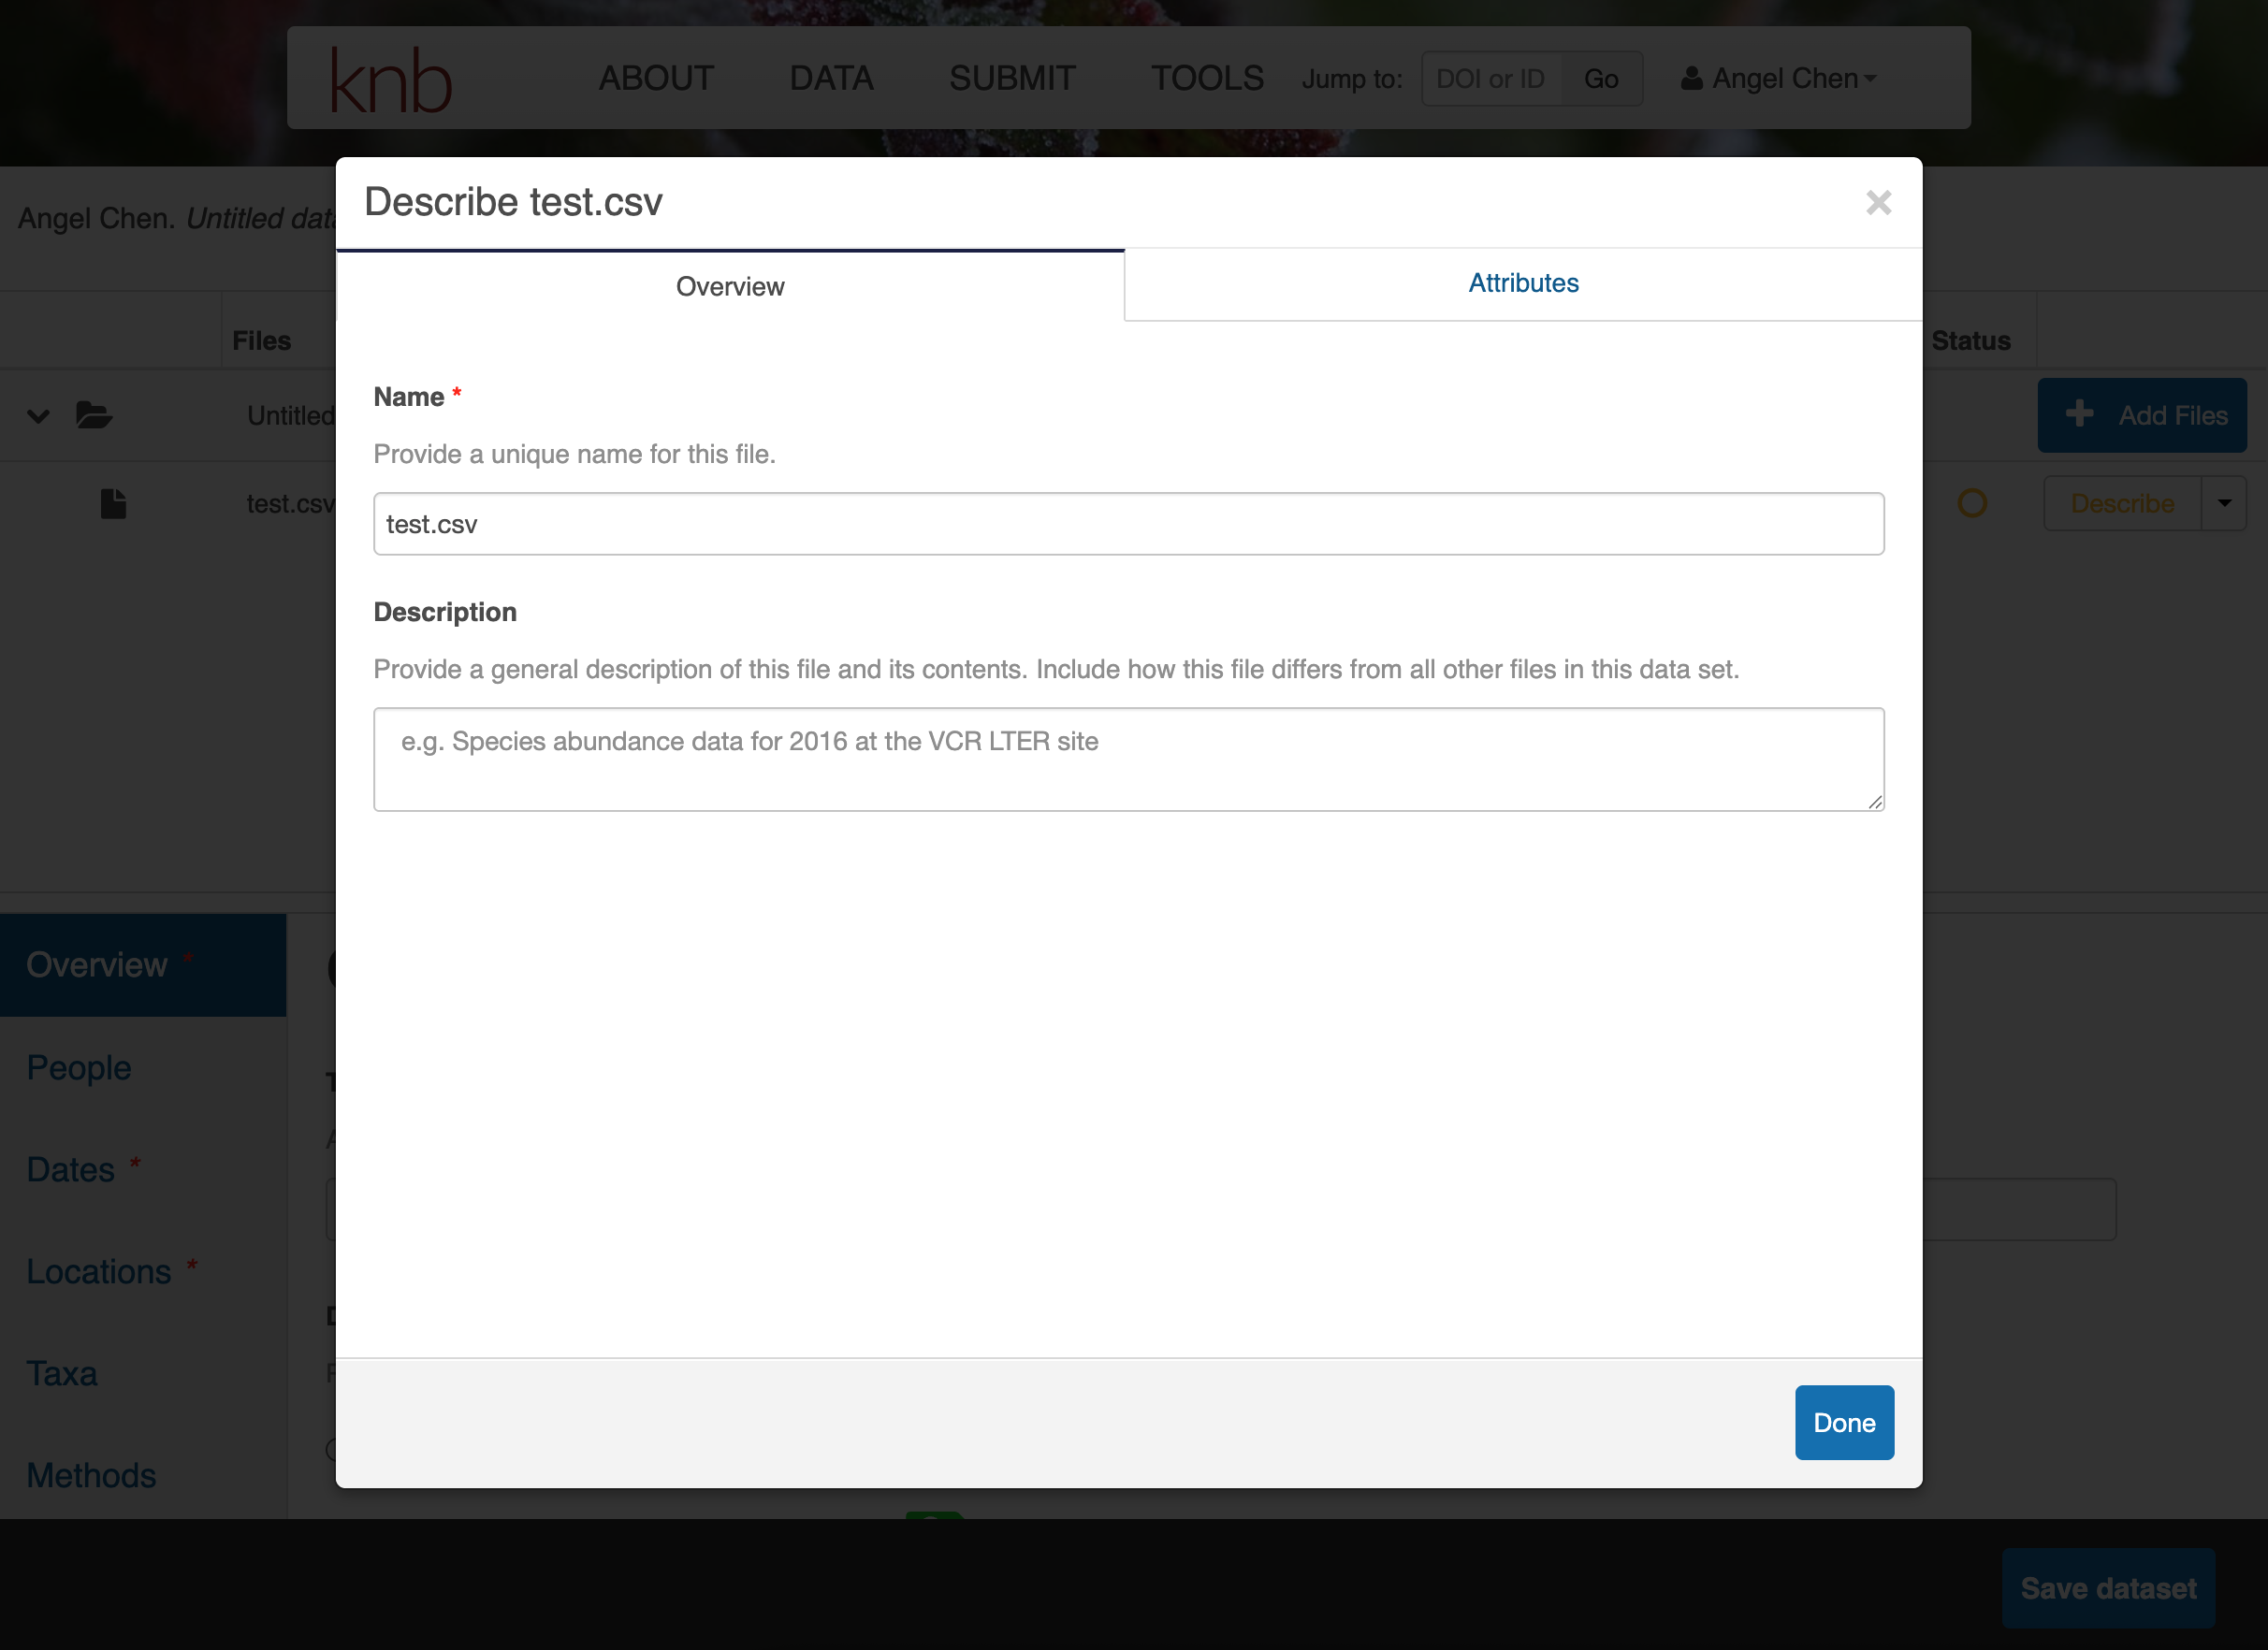
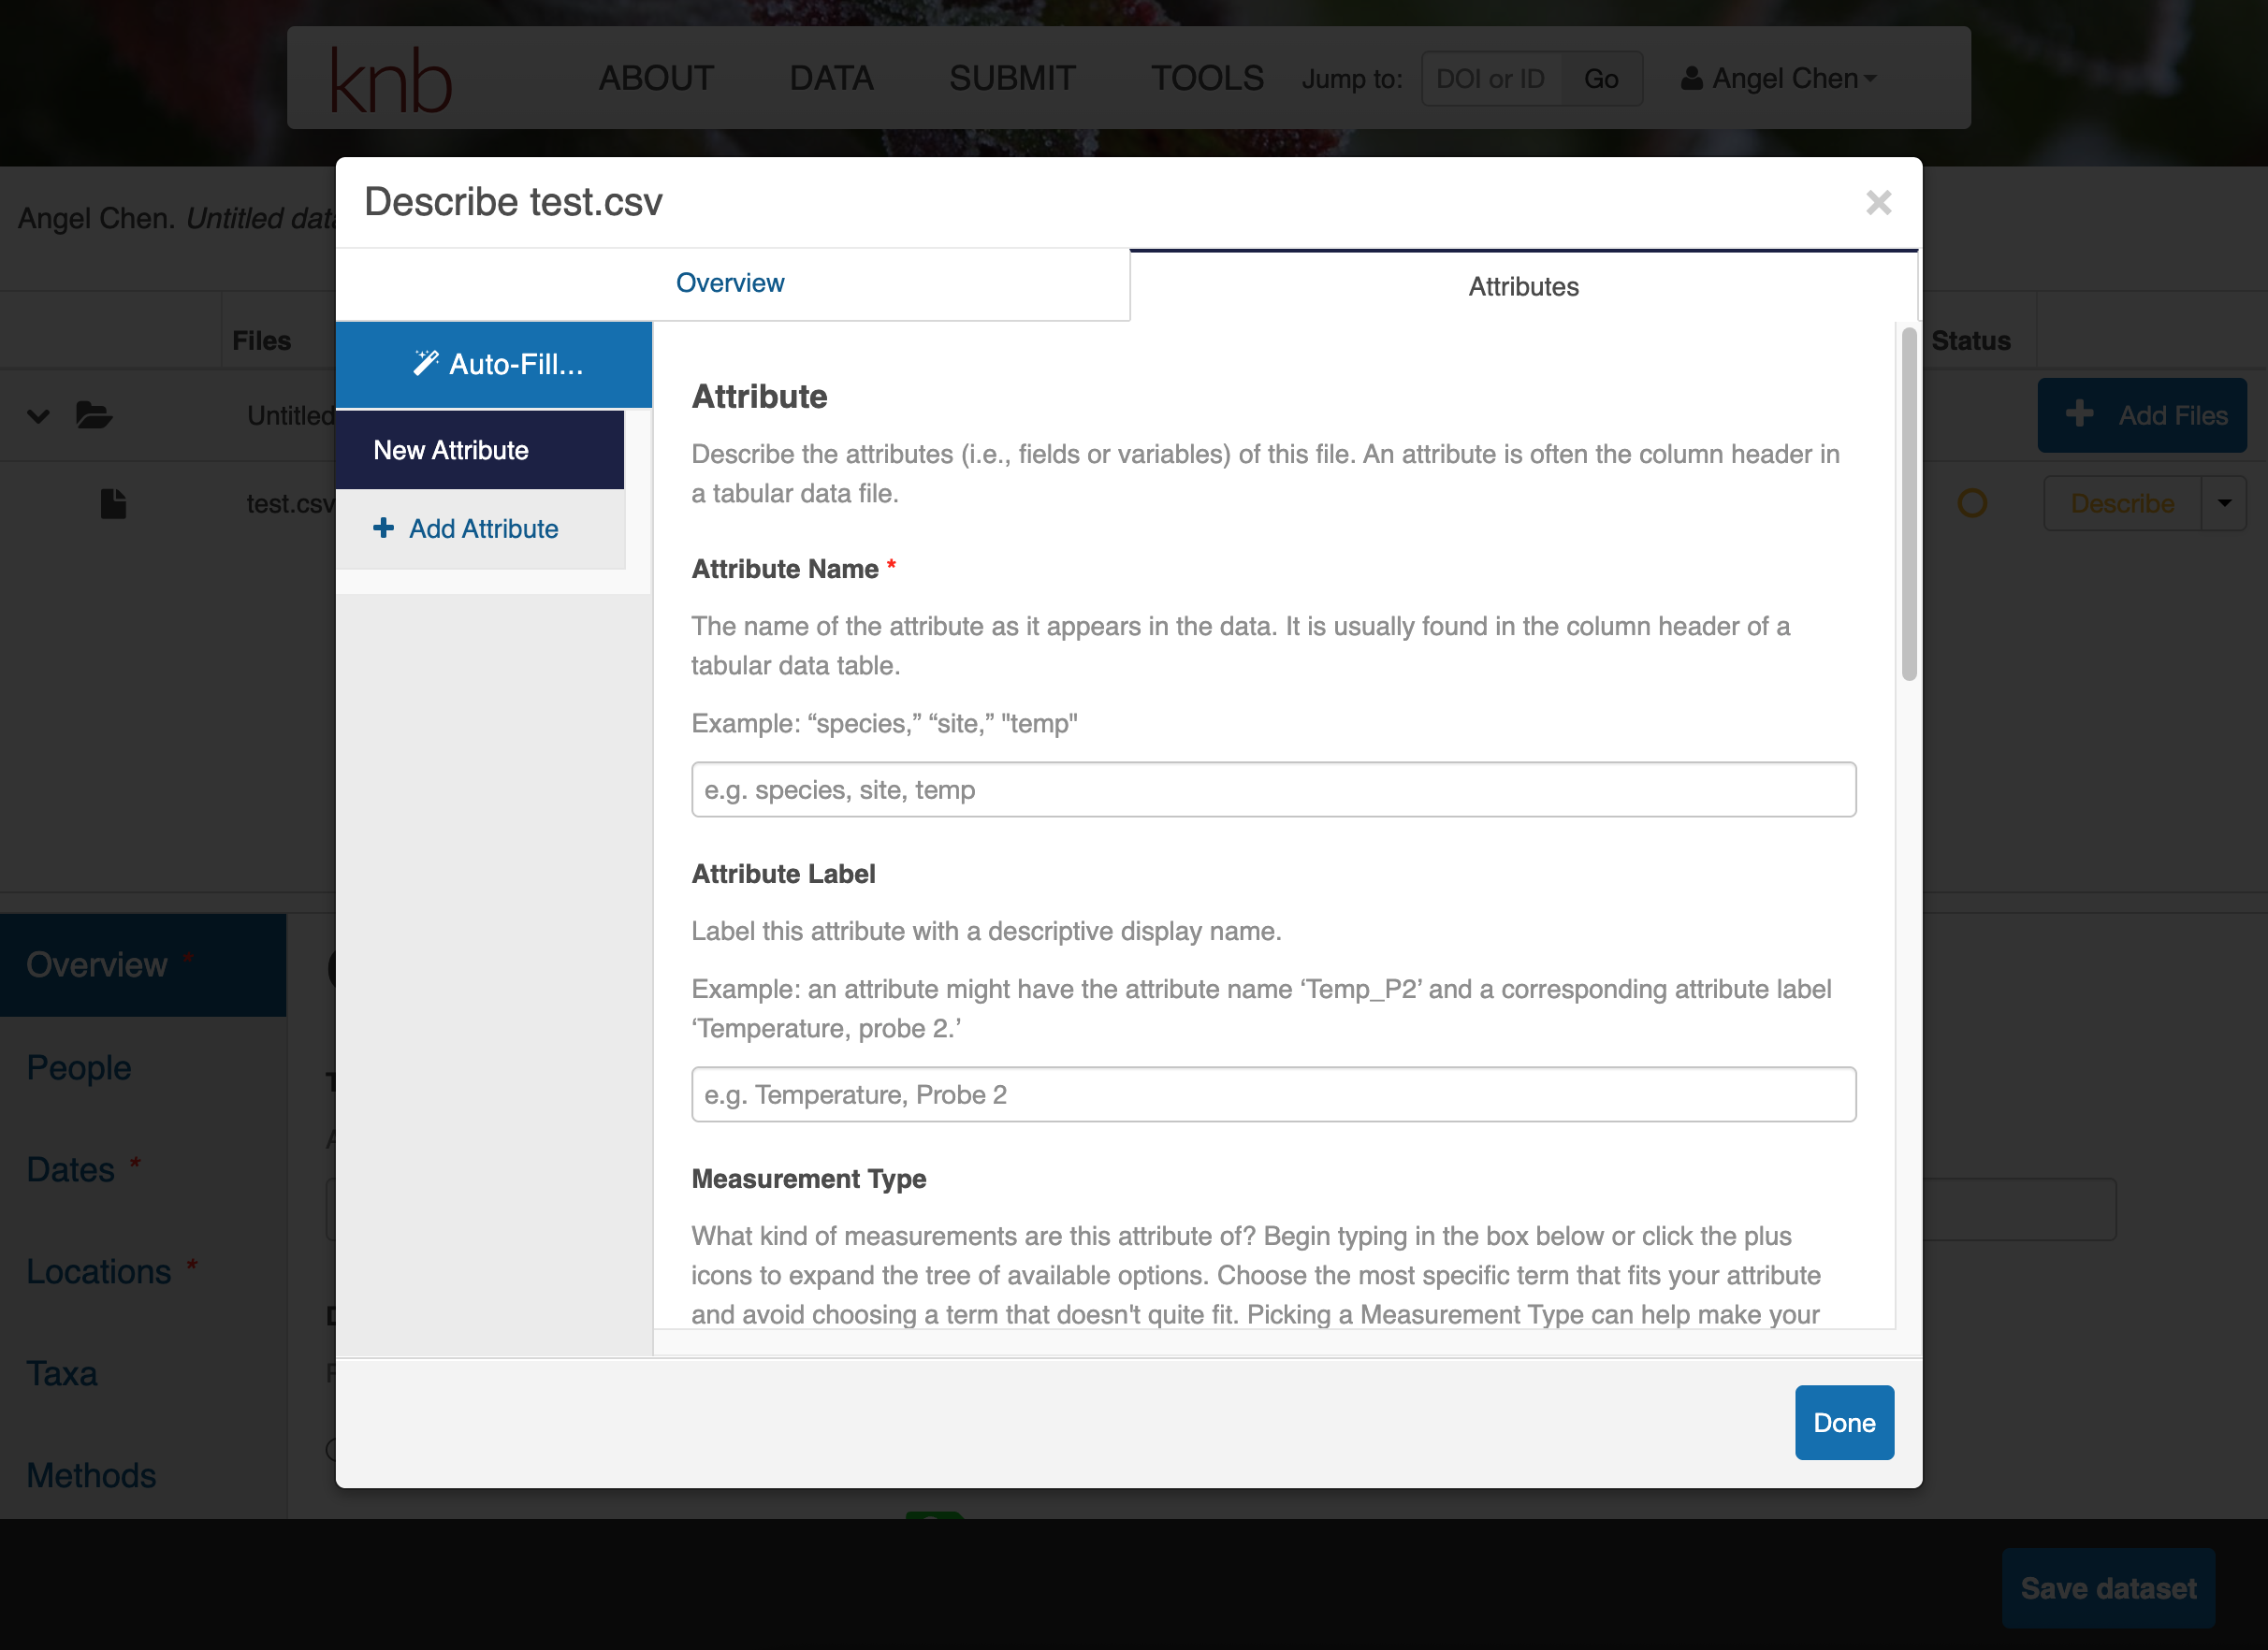
Click on Describe to enter metadata about the data files. Provide a file description and information about the attributes/variables in this data file.
Once you’re done entering the metadata for the data files, you will also need to fill out the rest of the metadata fields in the bottom half of the web form. Fill out the Overview, People, Dates, Locations, Taxa, and Methods sections as best as you can.
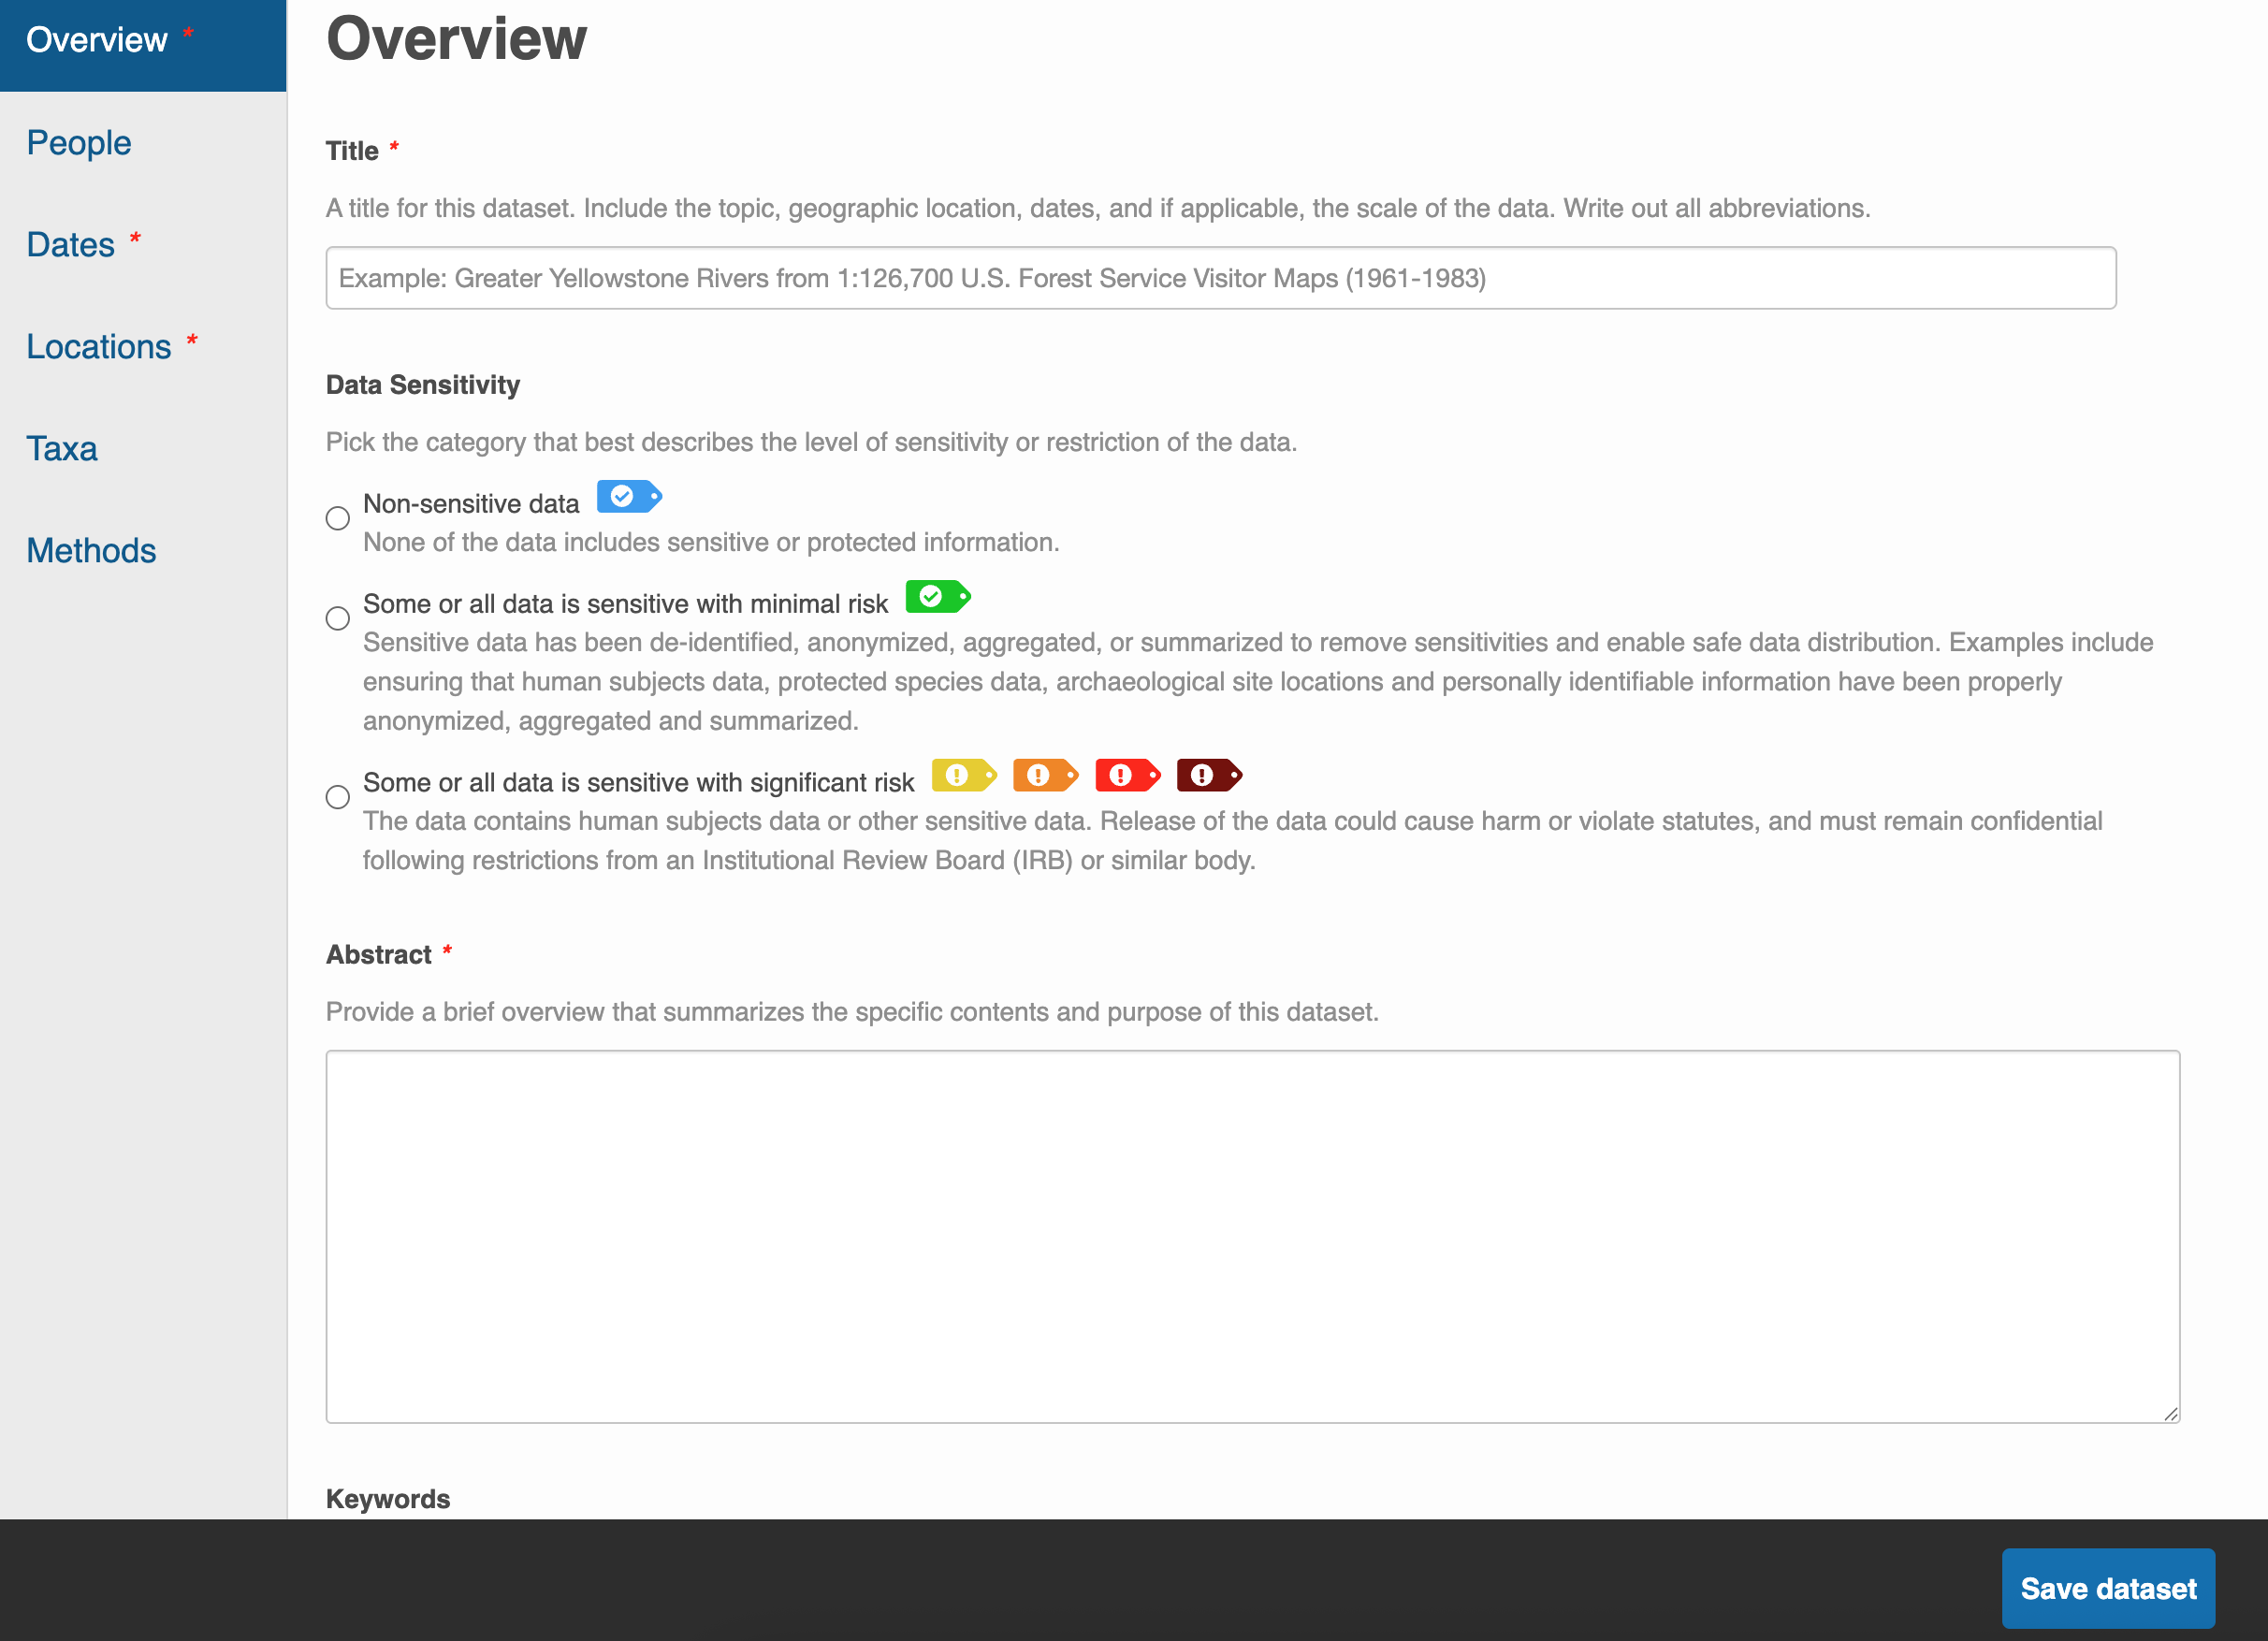
Like with EDI, you do not need to worry about submitting all your metadata in one sitting. Utilize the Save dataset button to save your progress and feel free to continue another day.
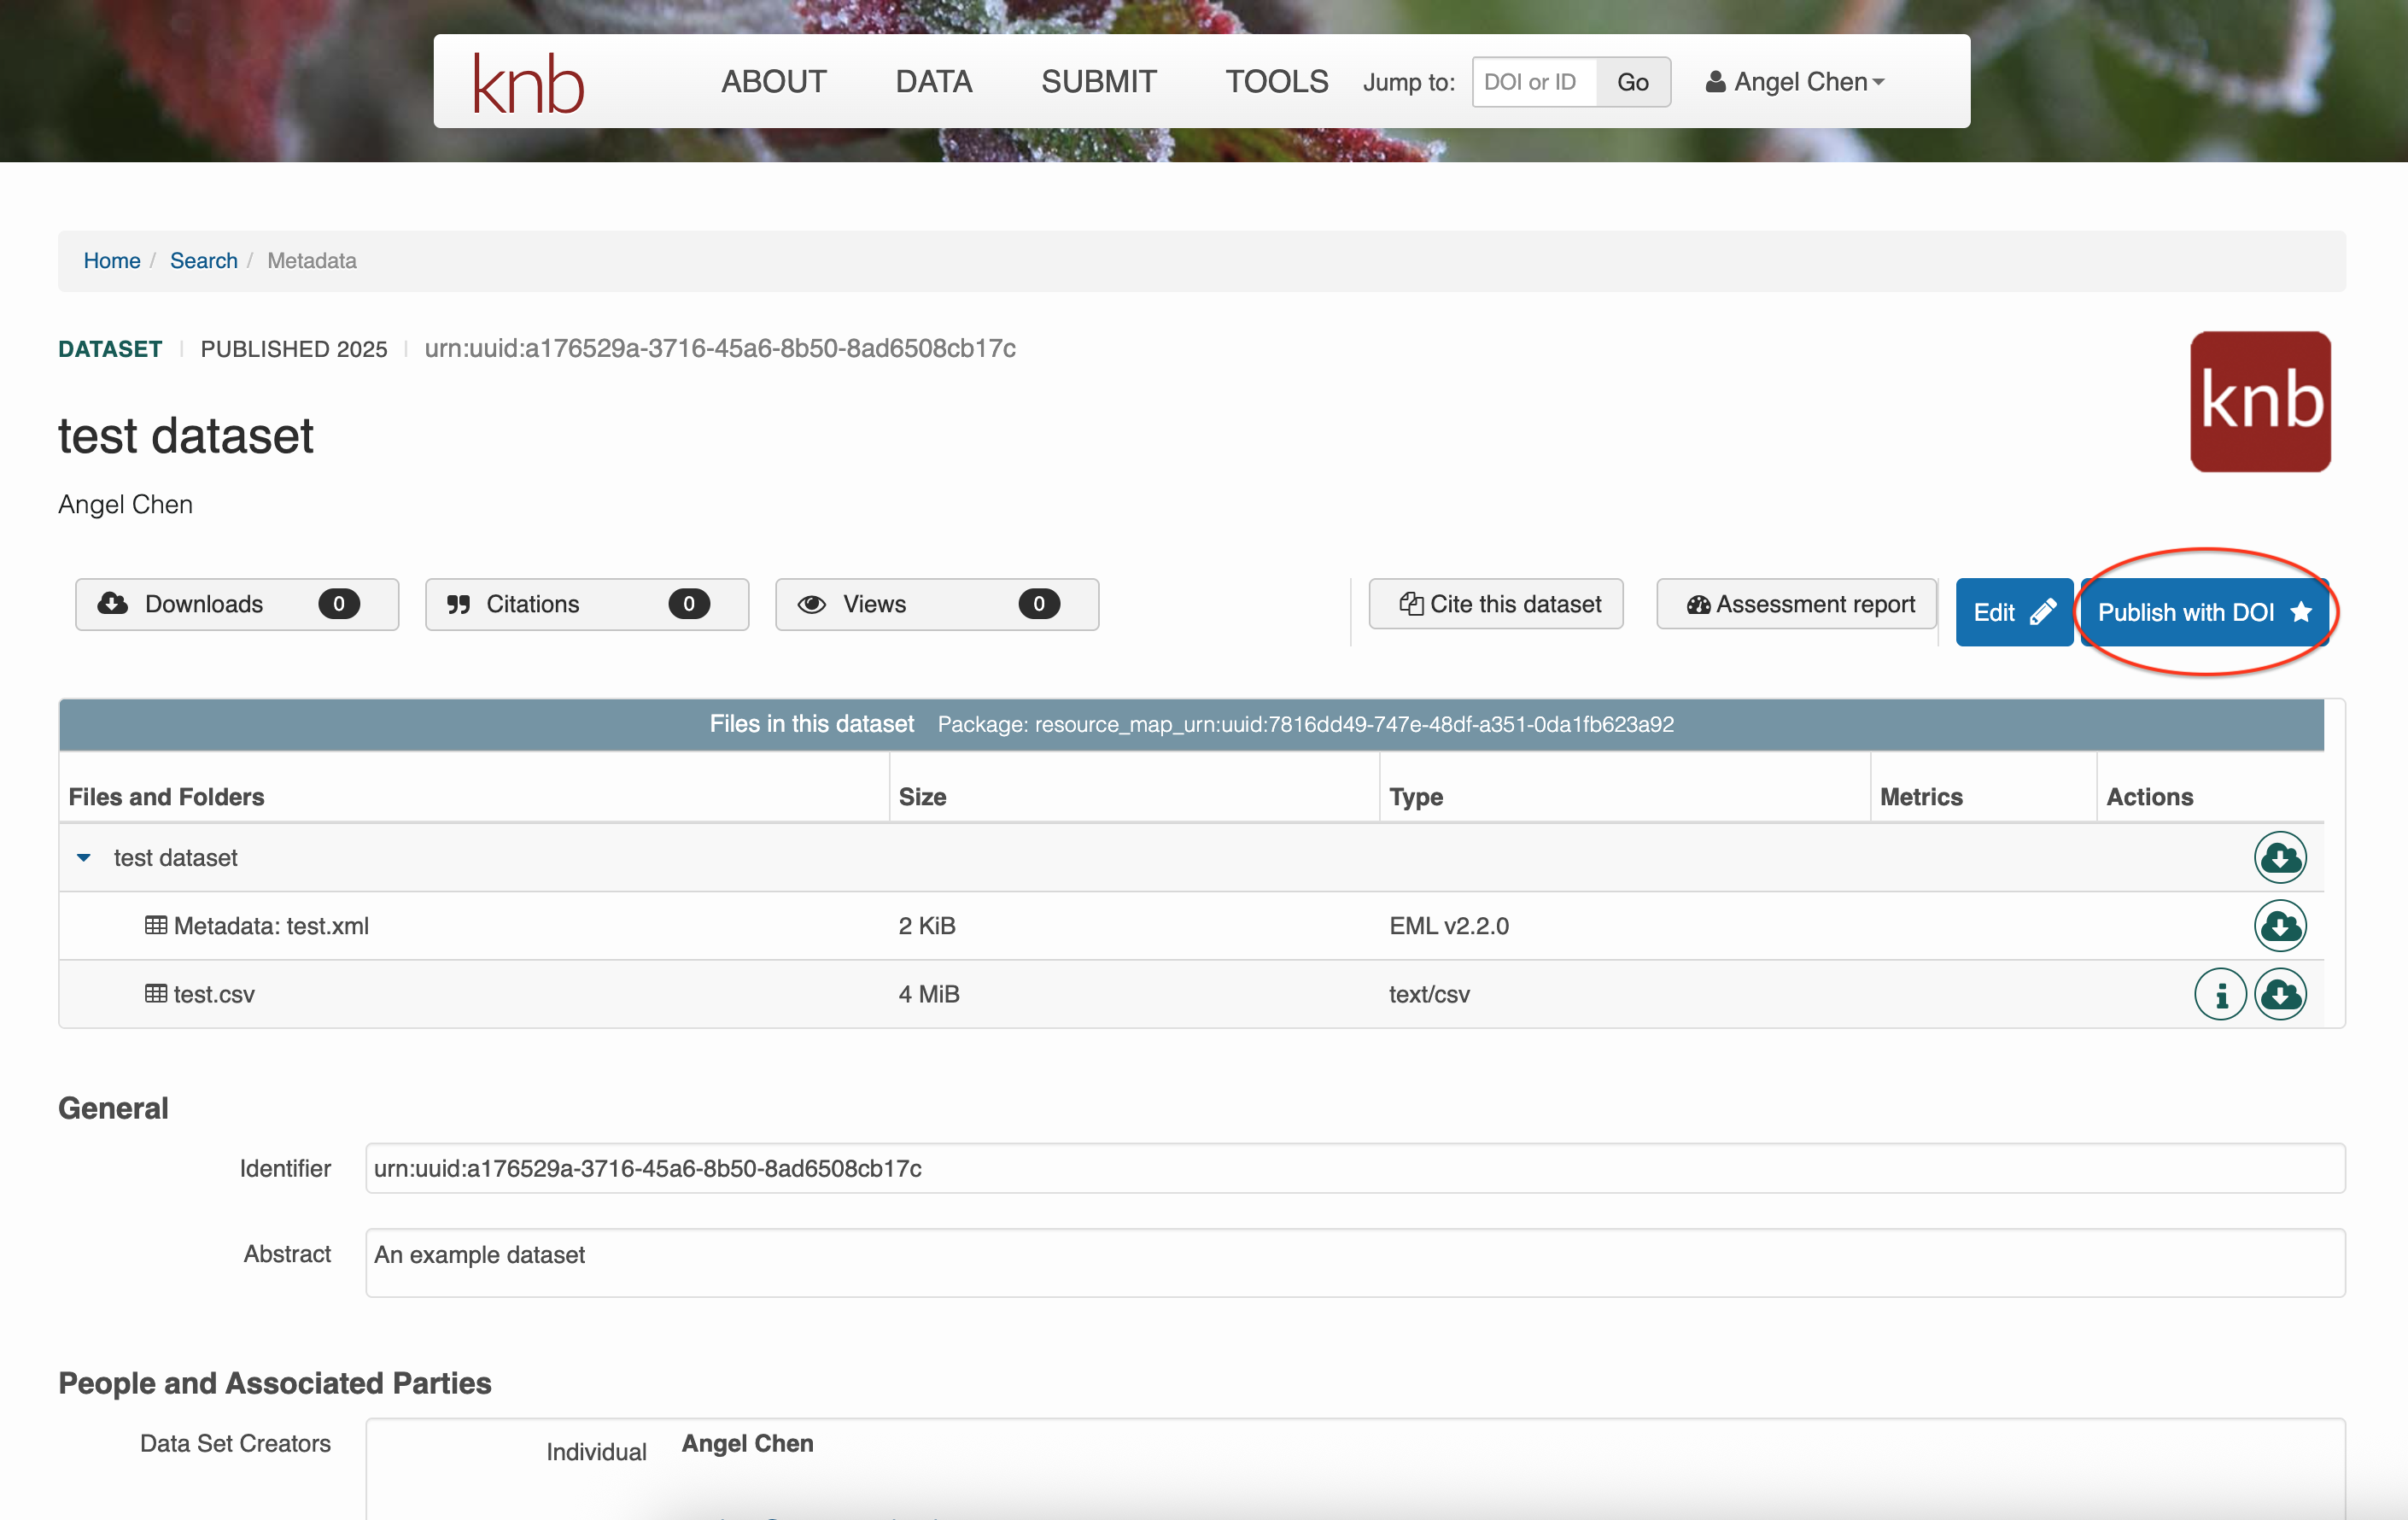
After you’ve saved your dataset once, you can come back to the same submission to edit it however you like. Unlike EDI, you can publish your data package in KNB by assigning it a DOI yourself. Click on Publish with DOI whenever you’re ready. Of course, you can continue to edit your data even after assigning it a DOI, but be aware that a new DOI will be issued for every version of your submission.
For extra assistance, email KNB (knb-help@nceas.ucsb.edu) or browse other data packages on KNB to get an idea of what the final product should look like.
Accessing Data from Repositories with R
Now that you have your data published, you can access it via R. Below is an example script on how to get data from EDI and KNB.